Tag: OER

Net Art 2.0: Expanding Creativity Through AI and Open Access

Net Art 2.0: Expanding Creativity Through AI and Open Access

If you’ve found your way here, welcome!
You’re stepping into a platform that’s always been about more than just “art.”

When I first created Net-Art as an Open Education Resource for the CUNY Academic Commons, it was with one goal in mind: to offer an accessible, flexible, and creative space for anyone, anywhere, to experiment, express, and connect through digital tools.
We explored early web making, animated GIFs, vaporwave aesthetics, glitch art, augmented reality experiments — all fueled by the same spirit: freedom to create!

For the last year or so, I took a natural pause..
(Artists know — evolution happens in cycles.)
During that time, my creative life expanded in ways I could never have fully predicted: major commissions, deeper explorations into virtual and augmented reality, and a whole new relationship with artificial intelligence as a creative partner.

Today, it’s time to officially evolve Net-Art into its next form:
Net Art 2.0.

What stays the same:
The mission remains, open access, creativity, experimentation, and joyful exploration.

What grows:
We are welcoming AI as a new ally in the creative process!

AI is not here to replace artists, designers, educators or art and design educators..
It’s here to expand our reach, help us prototype faster, spark unexpected ideas, and bridge the gaps between imagination and reality. Just like when we first explored glitching GIFs or remixing early memes, AI is simply another tool to push creative frontiers.

In the coming months, you’ll find:

  • New assignment prompts that integrate traditional net art practices plus AI co-creation
  • Resources on using AI ethically and creatively
  • Explorations of how machine learning intersects with human storytelling
  • Open dialogues about where technology and art-making meet (and clash)
  • Lots of new experiments (because that’s the heart of this place)

This isn’t about abandoning the past.
It’s about taking everything we’ve learned from graphic design, digital art, blogging, storytelling, HTML experiments to animated GIF narratives and adding powerful new dimensions.

Net-Art was always a living, breathing, evolving organism!

Now it’s ready to breathe a little bigger, dream a little wilder, and reach a little further.

Thank you for being here.
Thank you for continuing to explore, question, and create.
The next chapter is going to be even more amazing — and you’re already part of it.

Let’s keep building it, together!

Assignment – The Keeper of Crossroads – Reimagining Analog & Digital Fusion

A Reimagined Analog and Digital Fusion image of abstract shapes and forms composed in harmony - values of reds, blues, oranges and yeloows are presentAssignment Title: Keeper of Crossroads – Reimagining Analog and Digital Fusion

Assignment Introduction:

Every so often, an artwork finds a way to call itself back into your life.

While traveling and reflecting on a new chapter of growth, I stumbled across an image from my archive, a digital illustration I originally created back in 2013. I had almost forgotten about it, but somehow, it kept resurfacing, almost demanding my attention. The artwork, which I now call Keeper of Crossroads, started as a physical cut paper collage, full of bold shapes, raw energy, no rules, just pure intuition, forms, and color.

After scanning or photographing the original, I spent hours playing with it digitally. I intentionally “degenerated” the resolution in Photoshop, pushing it into that gritty world I loved so much, the feeling of vintage offset lithography from the 1960s–80s, like the textures you find in old comics and mass-printed magazines.

At the time, I was simply following my curiosity. I didn’t realize I was making something that would eventually feel like a visual prophecy. Now, more than a decade later, I recognize this piece as a fusion of timelines, mediums, and energies, a symbol bridging the analog and the digital, the remembered and the reimagined.


It feels only right to now turn this discovery into an invitation for you to create your own “Keeper of Crossroads.”


The Assignment Prompt:

  1. Create a piece of digital artwork that begins from a physical, hands-on medium (for example: a collage, a drawing, a painting, a sculpture, even a rough paper cutout).

2. Then, digitize your piece — either by scanning, photographing, or documenting it with your phone.

3. Once digitized, use Photoshop (or a digital app of your choice) to “degenerate” and transform it.

Play with resolution changes, filters, color distortions, and texture overlays. Let the imperfections guide you. The goal is not to polish the image — the goal is to merge the analog spirit with digital experimentation. Let the unexpected surprises that happen through the process become part of the final piece’s story.


What to Submit:

•A digital version of your final artwork (JPEG or PNG format preferred).

•2–3 sentences reflecting on the process.


Some questions you can answer:

•What was your physical starting point?

•What surprised you when you moved into the digital world?

•How did it feel to let go of “perfect” and embrace imperfection?


Optional Bonus:

Share a side-by-side image showing your original physical piece and the final digital piece.

Have Fun!

An Exhibition in Virtual Reality

a low angle perspective view of the interior of a VR art gallery of digital arts by artist Ryan Seslow

My First VR Gallery: A New Portal Opens

Over the last few years, I’ve been experimenting with VR and something that feels like a return to a truth I’ve always known:

Art wants to live in worlds, not just walls.

Using a platform called OnCyber, I built my very first VR gallery space. You can watch the video above as a preview, but if you have a VR headset, go to this link (obviously).

It’s a simple structure, but it’s filled with powerful energy, the energy of real work, real time, real effort.

Inside the gallery, you’ll find a collection of my 1/1 Crypto Art originally minted on my SuperRare profile (many of which have not sold yet, which is a perfect reminder that creation doesn’t depend on outcome). Along the floors, I dropped a few of my newest 3D sculpture experiments as well.
They are playful markers of the new worlds I’m beginning to build.

This space wasn’t about selling.
It wasn’t about chasing attention.
It was about honoring the archive and giving life and motion to pieces that otherwise sit quietly behind digital walls.

It’s about creating a new portals where the work can continue breathing, evolving, and radiating its energy. I love my work and deeply believe in its value to inspire my fellow humans.

“The Tessellation Garden” project is coming soon… but this first step felt necessary.

(Oh, and I promise that I will be sharing my full artist residency works / studio with the Loop Art Critique / MUDD foundation here soon too!)
A reminder to myself that building worlds starts with the tiniest acts:
dragging, dropping, rearranging, giving your work a home inside imagination.

In a way, this first VR gallery isn’t just a space.
It’s a seed.

A seed for new worlds, new viewers, new expansions I can’t fully predict yet, but can already feel the buzzing in the air.


Thank you for being here!

How to Create Paper Cut-Out Art: Tips & Techniques for Beginners

Back again with another lil’ series of 2D wall relief paper cut-out forms. Both of the pieces below follow the same process and technique. Im really happy with the process and outcomes. Im working on animating them as we speak. I’ll add them to this post later, so be sure to check back! My paintings inspire my drawings, and my drawings are inspired by those same forms found in my paintings. It makes sense that every so often I want to make those forms “pop out” and off the surface of a flat plane. Alas, it all starts with a quick sketch. See below, just a series of light loose free flowing lines take the lead, forward ->

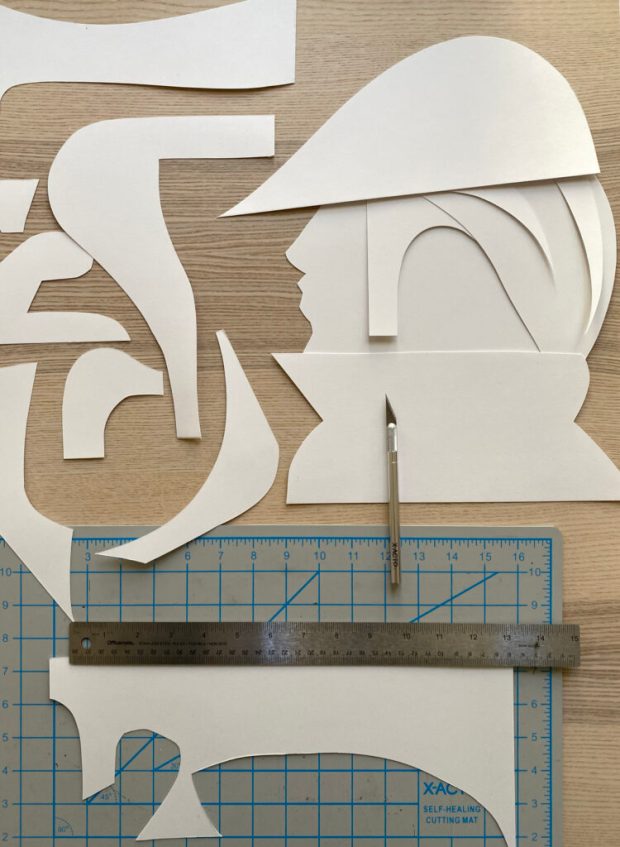
Here we have a dude posing for a profile style portrait. Most likely, this is inspired by the NYC B-Boys from the years 1983 – 87ish. Either way, it’s nostalgia for me. Once the sketch feels good, I’ll break out the paper and x-acto knife. I keep telling myself that one day Ill work with another material other than paper for these works, perhaps wood or metal.. It will happen, I can foresee it for sure, hang in there. Im using a white bristol paper for the cut outs, I believe is the vellum type and not the glossy, but either or will work just fine. I love to cut paper and the whole medium of paper art in general.

Paper cut-outs, also known as paper cutting or Kirigami, is a traditional art form that involves cutting shapes and designs out of paper. The history of paper cutting can be traced back to ancient China and Japan, where it was practiced as a folk art. The Chinese and Japanese would create intricate designs, often featuring animals, plants, and mythical creatures, and use them as decorations for festivals and special occasions.

Using the sketch above, I apply the “map” of the shapes and forms that I see. Sometimes I redraw those forms on the paper that I will cut out, and sometimes I just “draw” with the x-acto knife to recreate the forms. Sometimes, it’s a combination of both of those techniques. There is also a series of “out-take / byproduct” cut outs that do not make the final piece, those can be saved and used for the next piece, obviously!

More history, for context – the art of paper cutting spread to other parts of Asia, including Korea, where it evolved into unique styles and techniques. In Japan, for example, paper cutting was used to create delicate and intricate designs for paper lanterns and screens. In Europe, paper cutting was popularized during the Renaissance and was often used to create elaborate decorative patterns for books and other printed materials. Check the bottom of this post for a list of other artists that work with the medium.

I layer the forms on top of each other to compose the arrangement as a whole, its fun to watch it all come together, in the next phase, you will need some kind of durable tape or you can make little paper forms that can be pasted to both sides of the forms as they stack, this will create the gauge and depth of the piece once it is placed onto the wall.

This is the final composition above, I love it! I used a roll of duct tape to make small cylinder forms that connect the pieces together, the piece as a whole comes “off of the surface of the wall” by about 1.5 – 2″ inches – you can play with this a bit but keep in mind, the tape makes the piece heavier and it will want to comply with gravity 🙂

I hung the piece (also temporarily adhered via the same duct tape) for the photoshoot and to also get a good look at how it will function on the wall. I have an old painted fire place in my studio that is a great surface for hanging things, I love the contrast of textures between the bricks and the paper, as you know, the shadows will be super cool to see too.

Once I had the whole piece constructed I took a few pictures of it. I immediately wanted a clean vector line drawing of the whole character. I brought the photo into adobe Fresco and used a vector brush to draw this lovely variation. This is how my brain works, I switch paths because I know they are really pipelines to the “next thing” that I will push this to, so forward we go. I can see this potentially becoming a new logo for an aspect of my design biz, or at least a new t-shirt in the classic newyawk series

Then, it was light source and photo shoot time. Im not really happy with these picture as traditional “photographs” as I know I can do a much better job, but, as a series of “sketches” for a planned photo shoot, these will really help to make those plans a reality. I love neon colored lights. I have a bunch of them from various places and spaces that I found on the internet. Amazon has a great selection of flashlights with various colored light options. Get a few and play around with how the light can effect your work and the shadows that it creates. This is where the depth and gauge of your pieces play a role. The photos below are also a part of the same session, which all took place over a few days. What do you think? Shall I make more?

In the 20th century, paper cutting experienced a resurgence in popularity as an art form in its own right. Notable artists who have contributed to the art of paper cutting include:

  1. Béatrice Coron: A French artist who has created intricate and expansive paper cut-out installations for public spaces and galleries around the world.
  2. Yoo Hyun-mi: A South Korean artist who creates paper cut-outs that explore themes of identity and cultural heritage.
  3. Hina Aoyama: A Japanese artist known for her intricate paper cut-outs of animals and natural landscapes.
  4. Elsa Mora: A Cuban-American artist who creates whimsical paper cut-outs that often feature fantastical creatures and characters.
  5. Hunt Slonem: An American artist known for his large-scale paper cut-outs of birds and butterflies.
  6. Xiyadie: A Chinese artist who creates intricate paper cut-outs of traditional Chinese motifs and landscapes.
  7. Hari and Deepti: An Indian artist duo who create mesmerizing paper cut-out scenes using layers of intricately cut paper.
  8. Karen Bit Vejle: A Danish artist known for her intricate paper cut-outs that often feature patterns inspired by nature.
  9. Nikki McClure: An American artist who creates minimalist paper cut-outs that often explore themes of motherhood and nature.
  10. Wu Jian’an: A Chinese artist who creates paper cut-outs inspired by traditional Chinese art and mythology.


Welp, if you got this far, many thanks! Much more to come!

2023 – 2024 – NET-ART OPEN-CALL for Submissions!

It’s that time Again!

The NET-ART OPEN-CALL for Submissions continues this semester!

FALL 2023 – Spring 2024 Edition

What does this mean? What is NET-ART on the Commons?

The NET-ART 2023 – 2024 academic calendar is now accepting submissions on a rolling proposal basis in the following criteria:

  1. Electronic Media / Experimental Pedagogy
  2. Animated GIFS
  3. Digital Art
  4. VIDEO ART / Experimental Film
  5. NET-ART (Works created in and displayed in a web browser)
  6. Class / Course Collaboration
  7. Digital & Analog ZINEs
  8. Curatorial (A Curated Group Exhibition)
  9. Solo Exhibition
  10. Related “Otherness” pitched to us

Looking for useful tools, apps & tutorials to get your submission started? CLICK HERE!

Looking for examples of “what” has been submitted previously? Explore here!

a colorful image of a subjective landscape from another world

The NET-ART Submission Guidelines:

Submissions may be generated by CUNY faculty, students of all levels, alumni & community members. CUNY classes/courses may also submit collaborative proposals as a group. CUNY faculty & students may also collaborate with others from outside of CUNY as well.

All submitted works will be featured and published as individual blog posts as well as added to existing galleries on the NET-ART website.

Depending on the submission’s proposal, relevant and in context, various submissions will be published and exhibited as an individual page created specifically for the project.

All submissions should be described in written detail with a clear vision, context and meaning. Supporting images and links should be provided as well.

Authors of the submissions and their collaborators must be willing to participate, respond to comments and expand upon their projects with incoming queries via the commons, twitter and beyond.

The purpose of exhibiting submissions in various categories displays a platform for creative and experimental methods of pedagogy. Please consider how your work will contribute to a larger whole that will be archived for teaching, learning, reference and posterity.


We anticipate your submissions!

Question, Proposals & Submissions can be sent via e-mail to:

rseslow@bmcc.cuny.edu

Exploring Digital Art and Design on the Commons – A Workshop

“Exploring Digital Art and Design on the Commons: Techniques and Applications for the Classroom and Beyond”

Wednesday, May 11th 2022 – 11am – 12:30pm

Welcome!

This presentation is for the CUNY GC / Teaching & Learning Center’s Open & Digital Pedagogy Wednesday Workshops Series.

Hosted by Anthony Wheeler & Ryan Seslow

Welcome All!

This workshop will be conducted and archived from this blog post here on this website.

This website is chock full of resources so please dig in!

PS – This post will also receive a few updates from time to time as contrast creates more inspiration! I hope to share the recorded zoom workshop info as well (if possible)

This post is also a creative snippet and reflection of what is possible here on the commons. (Im a big fan!)


an abstract digital illustration consisting of many graphic assets


So, What is Digital Art? – via wikipedia

“Digital art is an artistic work or practice that uses digital technology as part of the creative or presentation process. Since the 1960s, various names have been used to describe the process, including computer art and multimedia art. Digital art is itself placed under the larger umbrella term new media art.”


Some Digital Art History -> a timeline

A bit more here <–

and a bit more here as well <–


Questions to Ponder?

What is the creative potential of an image?

What is YOUR creative potential in relationship to an image or images that you feel connected to? 

How can intuitions, feelings, philosophies and or inspiration play a role in image-making?

You do NOT need permission to experiment with digital image making / digital art, so let’s get to it!

The academic commons is a perfect example of a platform (WordPress) that both supports and compliments image based content. File formats like .JPG or .PNG work well here! Let’s begin our reign of creative image-making and take over!! 


LETS MAKE SOME DIGITAL ART!


We will experiment with some great “Free to Use” Digital Tools:

Lets create a page using mmm.page  – https://mmm.page

mmm.page is a web browser based digital collage making platform / space. It works perfectly in your web browser. It also works on mobile devices!


Here is an example I made with mmm.page:

https://mmm.page/ryanseslow.main


*I pre-prepared a series of transparent graphic assets that you can download and use for this, but feel free to make and discover your own, especially if there is specific context to your ideas. Here is the shared folder link:

https://drive.google.com/drive/folders/1ZWB0jL_z_iU9mH2rf3Imthk4AUpYYRGi


a surreal arrangement of objects and things placed into a situation..


Places to find Images online – Creative Commons based:

Pixabay.com – great resource for images and transparent assets! (we will use this for the workshop)

National Gallery of Art  With the launch of NGA Images, the National Gallery of Art implements an open access policy for digital images of works of art that the Gallery believes to be in the public domain.

Digital Public Library of America The Digital Public Library of America brings together the riches of America’s libraries, archives, and museums, and makes them freely available to the world.

NYPL – The New York Public Library Digital Collections Archive

Flickr CC – Creative Commons on Flickr.

Gif Cities – Internet Archive

The Noun Project –  “Graphic Icons for anything”

Open-Access – Digital Collection – The Metropolitan Museum of Art

Giphy – the web’s largest search engine for animated GIFs!


Web Browser and FREE Digital Tools to Work with:

mmm.page – https://mmm.page

photopea – is a free web browser based digital image making and manipulating application, we can alter and manipulate and prepare images in this space! – https://photopea.com

Remove Image Background – https://www.remove.bg/

PIXLR – https://pixlr.com

Image Conversion Tool – https://convertio.co/

Vectorize an Image – https://vectorizer.com/

vectr – https://vectr.com

Glitcher – http://akx.github.io/glitch2/

Image Glitch Tool – https://snorpey.github.io/jpg-glitch/

Glitchatron – http://www.errozero.co.uk/glitchatron/#

Gimp – digital art making / photoshop-esque alternative – https://www.gimp.org

Trianglify Generator

Trianglify Generator 2 


Special Ops agents find themselves displaced into an art gallery

Useful Essays & How-To’s from this Website:

The Byproducts Poster of Twenty Twenty One

A Drama in Monotones, the tutorial..

Cut-N-Paste-Analog-N-Electronic-Ness

mmm.page Creative Awesomeness

Ink Jet Printer Print Remixing in the Studio

The Graphic Design for Websites, A 2019 Workshop


Please feel free to share your sentiments, questions and feedback in the comments section below! Let’s think of that space as a way to contribute to this post.

PS – Check out more on my website – ryanseslow.com or follow me on twitter or IG

Many thanks!

mmm.page Creative Awesomeness

mmm.page Creative Awesomeness

Ah, the speed and the beauty of the Internet! The Internet will always find out, and the Internet will compel you to share! Less than a week ago I was “woke” to mmm.page by my fellow colleague, collaborator, mentor and friend; MBS, aka Michael Branson Smith! MBS has an amazing acute radar for discovering all kinds of new creative digital tools! He always finds them first and so graciously alerts me right away! This past Wednesday he did this with mmm.page! He shilled me an example of what he created using his mobile device, I was impressed and activated! I jumped right in. I signed in. No password needed, just input your e-mail address and wait for the link to verify – that is all that is needed. Within 2 minutes I was in and creating…

I became reflective, immediately. A lot of digital artists and educators like myself may recall Net-Art creation sites like “newhive” and “to.be” back in the late 2010 – 2015-ish years. Those platforms were super cool for the time, purely web browser dependent, Net-Art making machines that pushed the context of the tool so far ahead. Both platforms created huge communities and produced a lot of new artists, art stars, web browser enthusiasts and educators. The creative potential of the web browser continues to excite me. The truth is, if you build it, they will come, mmm.page has brought this ability and energy back! I have been literally looking for something like this since both newhive and to.be vanished.. I know a lot of other artists, designers, educators and creatives also feel this way too. Bottom line, the site invites your energy, awesomeness and creative immediacy. Let me says that again, creative immediacy. Creative immediacy is the action that is taken once we become inspired and mmm.page is a bolt of lighting in terms of creative immediacy.

The site is for everyone! Of course I am speaking and sharing from my own personal interests, examples and awareness of how I want to use the tool, but, thats just one perspective. The tool can easily be used for digital art making, but more importantly to make beautiful websites of all kinds, and to expand the context of what a website is and can be. Plus, just how much creative control we have with in the web browser space itself. This is also a creative license to develop a digital identity! (And, we may create many!) This excites the hell out of me. The creator of mmm.page is called “xh”. xh -is a super cool person who is community oriented and has allowed for me to begin infiltrating the platform 🙂 I immediately reached out and made a connection. I love supporting new projects, participating and making new friends. Its always fun to connect with like-minded awesome peeps who want to make and share utilitarian tools that can help others. Cheers to xh!


This post is just part 1 of the many that I feel I can write about mmm.page! Im excited to bring the site’s capabilities back into the realm of teaching and creating a series of both individual projects and collaborations between students, faculty and campuses. And of course I hope that MBS will participate! (I know he will!) Im also excited to develop a new body of digital art works using the site and meeting new people in the community. 

The first thing I did with mmm.page.. I applied MBS’s tip, I made a piece and shared it immediately as a part of guest talk and workshop I gave with CUNY Graduate Center students. The students were asked to use the site and jumped right in! – You can see that post here! (the results from the workshop are still flowing in as we speak)


I then got busy creating, playing and generating the examples below:


Here is the first series of my experiments made with mmm.page 

(click each URL and take a tour – most pieces are made via the desktop version but the last two links were made via mobile)


https://mmm.page/ryanseslow.main

https://mmm.page/ryanseslow.multi_drama

https://mmm.page/ryanseslow.forward_motion

https://mmm.page/ryanseslow.art_history_remix

https://mmm.page/ryanseslow.parttwo

https://mmm.page/ryanseslow.revolutions

https://mmm.page/ryanseslow.MobileFlow

https://mmm.page/ryanseslow.Mobilized


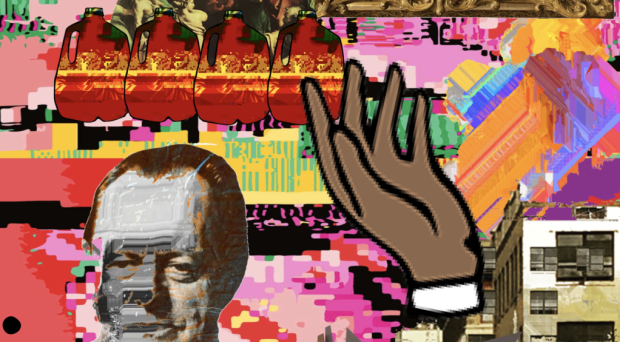
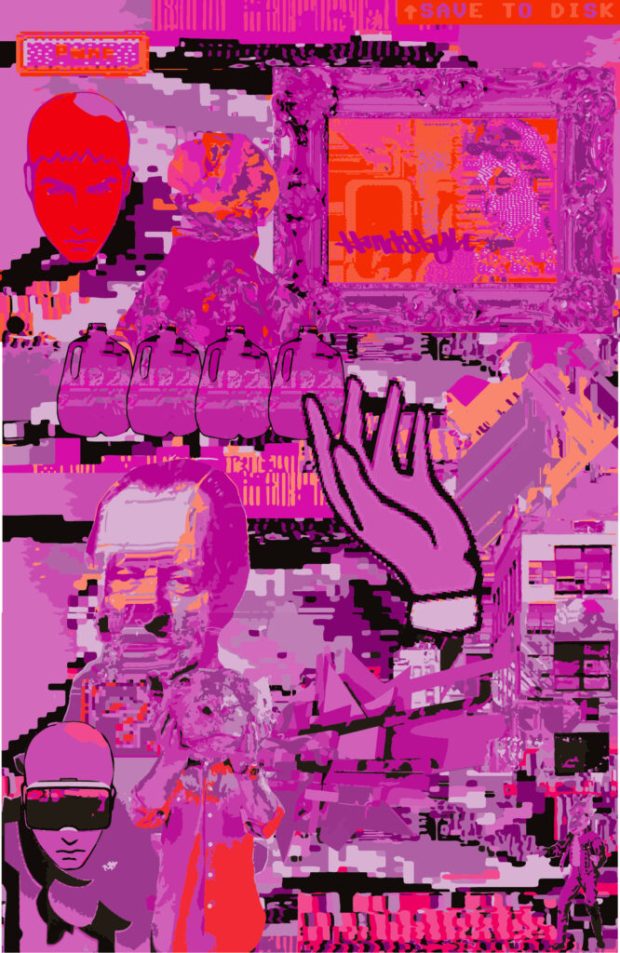
Do you like what you see above? Great, I thought so! Now, below you will see how things can be expanded upon further. The images below are full page screen shots taken with “GoFullPage” which is a free google chrome web browser extension that allows one to, well, get a full page screen shot. You can save the screen shot as a .PNG or a .PDF file. I began doing this with my mmm.page creations and then opening them in Adobe Illustrator to live trace them into vector files (I know, fancy fancy). As you know, vectors are scalable, you can make them and use them as small or as big as you wish, and they print really well too. So, mmm.page became both a creation and teaching tool as well as a catalyst to push things further. And of course adobe illustrator allows for infinite recoloring potentials.. Perhaps these pieces below will become 1/1 edition NFTs? Hmmm, lets see.. In the meantime, scroll below. PS – I may re-use these as background image settings for my next mmm.page creation. (fist bump)

More to come!


The Transcendent Energy of Play in the Classroom

The Transcendent Energy of Play in the Classroom

This post coincides with my guest talk on Monday 5/3/21 with the Interactive Technology and Pedagogy course.

Welcome!

Many thanks to Luke & Lisa, and the ITP students for having me!

I thought that writing a blog post here would be both timely and fun for this talk. It might be full of typos, those happen, haha, they can always be fixed 🙂 This post serves as an example and a potential to create and expand the overall synopsis, dialog, resources, feelings, philosophies and of course necessary contextual links! I hope through our interaction both here and during our talk that it will inspire you to create a playful, collaborative project for yourself, for this class that you are in, for the ones that you are teaching, and also with me here on the Net Art site! This is an inclusive, accessible and safe public space for all.

After our talk, be sure to scroll down to the “Reflections & further Pondering” part at the bottom of this post to share your thoughts. No pressure of course 🙂


Words like “playfulness, play and fun” are and have always been an essential parts of my teaching and learning practice. I directly extract the physical energy and emotions that these words activate with in me. I visually connect those feelings to bright sunshine. I connect playfulness to an overall lighthearted and open demeanor that can be applied to almost anything. It’s reflective to childhood and the wonders of learning, creativity and intuition. Playfulness is such a great form of expression as a medium. It sets an open invitation to access rapport. We can help each other learn this way, it is a passion of mine and Im not going to stop anytime soon 🙂


"communication" fingerspelled in American sign language

(Above – “Communication” – finger-spelled hand-shapes in American Sign Language)

Everything comes down to Communication. We all want to be loved, appreciated, heard, understood and included. I believe that this is our greatest life’s work, to learn how to best and fully communicate from the inner knowingness of who we are. Of course this is a journey through our constant growth of challenging our life experiences and how we reflect on them. Communication is our birthright and we all must tell our own story.


And then.. the Internet shows up..


Links for Context and Usefulness

(Feel free to use, remix, hack and expand upon anything here)


The Story / About the Net-Art website, Creativity & Experimental Pedagogy

NET-ART’s Rolling OPEN-CALL for Submissions


Graphic Design Workshop at the GC 2019

Rebirth of the Course Syllabus, The Visual Aesthetic – Part 1

How to Write your MFA thesis in Fine Art & Beyond – Commons Paper

Why Should I make a Portfolio?

The Net Art Course Lightning Talk


Cross CUNY Campus Zine Collab with the NYPL

Cross CUNY, Galluadet & Touro Zine Collab

Collabs with MBS


Check out this semesters undergrad course website flow:

CT101 – Digital storytelling – (commons)

MMA 100 Foundation of Graphic Design – (openlab)


Animated gif of a landscape passing through the interior space..

For more Ryan Seslow on the web – ryanseslow.com

I make a lot of GIFs, Check out my work on Giphy here

Communicating my Deaf & Hard of Hearing Self – The Online Exhibition

@ryanseslow – on twitter & instagram


Reflections & further Pondering:

In the comments section below, please leave your general reflections on this talk and the content presented.

What stands out?

What are the main take aways from this experience that you can implement and take action on right away?

What things do you struggle with as a student, educator and contributor to the world of education? 

Feel free to share links, and other relatedness.


Thank You so much!


An Agent of Accountability – A Digital Storytelling Prompt

An Agent of Accountability – A Digital Storytelling Prompt

*Assignment prompt – Create and apply digital imagery to exercise, express and extend a metaphor 

(this post is my example)


<begin-transmission>

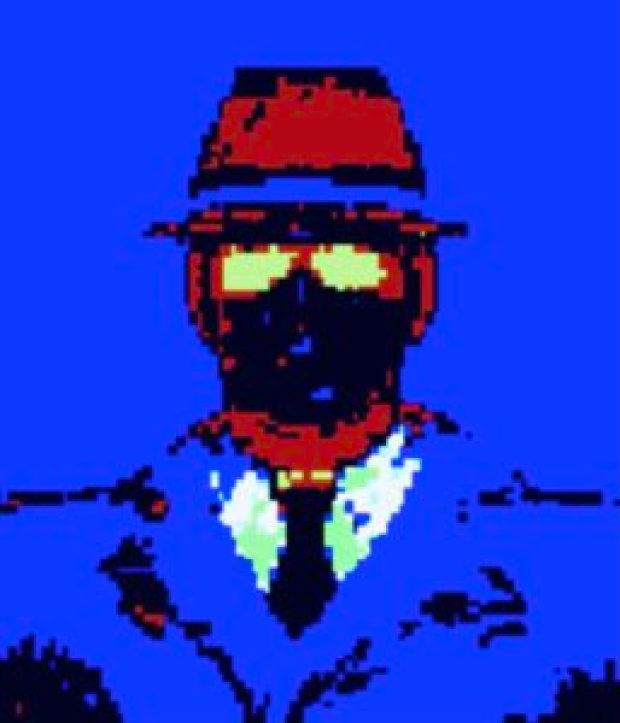
An agent has manifested from with-in you. You are fully responsible for creating and bringing the agent forward. You might not understand what that means just yet, but you will. The agent is made out pixels and rasters. Each pixel is recordable and programable. They each hold a unique series of your emotions, behaviors, interactions and potentials. The agent lives completely on screen and is co-dependent on your device usage and screen time. You thought that you could hide behind the screen, potentially conceal your identity, remain anonymous, and a mystery… but the agent knows otherwise. The agent is here for accountability.

The journey begins from here.. please scroll down.

This image above was seemingly the first recorded visual iteration of the Agent. It’s meta data has been corrupted and continues to be untraceable.. there is also evidence of the original file reconfiguring itself by single characters just to jam the reading/extraction or processing of the information for testing.

A visualization was created above to show “how” the agent entered the Internet grid. The simulation suggests that it was through an open port glitch. This is a vast statement as the range of “open ports” are extremely infinite as uploads and software updates take place around the clock, server to server, port to port. There is an unproven theory that agents can and do enter the grid from simple plug-in updates via the open-source platform, WordPress..

The image above is the most current image that continues to manifest in multiple places. Although there continue to be iterations, much like the two images below that were discovered in late April, 2021. The origin of the iterations are still speculative and only educated guess’s continue to surface with little to no real science based data as to why. What do the iterations represent? Why are they needed? Are they metaphors for pressing / avoided inner demons and issues? Are they there to continue to remind us that we are in a loop? We will continue to follow the process and keep you updated..

<transmission- snip>

Ink Jet Printer Print Remixing in the Studio

Ink Jet Printer Print Remixing in the Studio

Well, its April now..

Been at it again.. those tensions between wanting to make more digital art work versus making more analog based art work. Its weird to use the word “analog” instead of “applied” but I guess they are really similar. Allow me to elaborate. I always want to learn. Its an obsession and an addiction. Its a good addiction though, and the word addiction is probably over used in this context. I became aware that computers were a tool for making art as far back as 1986. The fact that I could learn to write a simple program that would visually display the action of repetition was all I needed to know, really. Well, and to see as well to understand “how” this new tool would help and forever change the way that art can be made and communicated. The word repetition is one of my favorite “principles” of art and design. The process of repetition can easily be displayed as a pattern, or a series of patterns, just like physical actions and behaviors can be observed and recorded as patterns. MEMEs are also patterns and have roots in psychology and behavior. So, do a little bit of math in your head and think about how this example effects you? Repetition in behavior eventually equates to practice. Sometimes this “practice” is totally intentional and we do it with awareness and other times, well, we unconsciously engage into the unconscious practice of behaviors that also equal patterns that may not be great for us.. but what about process based patterns of techniques?


The image above is a constructive, addition based relief sculpture made from found and recycled wood scraps. Each piece was found, accumulated, saved and later arranged into this composition (wood glue held it together at the time.) The image is taken from a bird’s eye view to help give the impression that the piece is flat (the bird’s eye view is me standing on the table with the camera.) The photo itself creates the overall two-dimensional impression.. (the actual sculpture has been dismantled and released back into the ongoing scrap bin graveyard of an ex-sculptors memories…) as I write this, I find it curious that I mainly documented the piece in this way. What did I for-see or know about this pieces legacy back then subconsciously? This is an image of the completed sculpture on the wood-shop studio table, before it was exhibited a few weeks later.


The actual sculpture was created in 2014, exhibited 1 time in public and then stored in my studio along with a few other similar works. OK, I actually made a ton of pieces in this similar process, style and technique, Ill dig them up soon again, and if you know my work, you can see where the latest paper sculptures come from. Lets face it, light and lighting plays a big role in the capture of images, and in this case, both images are not great examples of the sculpture in good light. But the placement and displacement of the piece hopefully helps the viewer to see some of the potential of where the idea evolved to and from. The piece looks very different against a plain white wall with a light source applied to it.


I rediscovered the 1st image recently (because I finally zipped, exported and downloaded my entire tumblr archives.. 3.9 Gigs worth..) and opened it in adobe photoshop. I got excited. I used the pen tool to create a series of paths that traced around the outside contour line of the sculpture’s form and image as a whole. I converted the paths into a selection and copied it and pasted it back into the original image as it own layer. I scaled it down by 60% and rotated the image 45 degrees counter clockwise. Wallah! This is the outcome above. I suppose it was the tinkering with this image that helped me see the potential of how I could extend my experiments with this piece, which now had become completely not only two-dimensional but also existing purely as a very flat digital file. The image above activated the energy, I knew I must take further action!


Above, the 2021 outcome! Well, #1 for now – I got really curious and began to see the potential of another tool, my old friend, the ink-jet printer! I dusted it off, thanked it for its trusted service and loaded it up with some glossy paper and began printing out the form that I cut out and re-mixed into the first image. I cut the image up into fragments and pieces of different scales and covered each piece with clear packing tape. I also left a stroke of white to contour each piece that I cut out, I think it helps! The tape, this was just in case I wanted to plant a few up in the street here in my neighborhood, which is always fun to do. The tape helps protect it for a while from the elements.. and also keep its form in tact. Plus, it gives the image the appearance of a sticker or decal. I made this arrangement above. The piece has some gauge too, it pops off of the surface of the wall at about 2.5 inches. The entire thing is adhered with thick gorilla duct tape on each piece. Duct tape is very temperature sensitive so when the temp in the room changes, things will shift and move a bit. I like how that fuses together with the fact that each piece is just printed paper with clear tape over it. The seemingly “cheap” medium tricks the eye into thinking this is something much more like wood, does it not?


Above you can see how the piece integrates itself into a few other works on my studio wall. The piece to the left is a figurative arrangement made in a similar way using bristol paper and duct tape and the portrait is a digital manipulation made from some data-bending techniques (that portrait image also has a layer of clear transparent packing tape on it.) I think that the clear tape actually adds another layer of saturation to the printed image. I think this picture helps give an impression of the overall scale of things too. Perhaps these pieces all kind of work well together too..?


This is a larger detail of the data-bent portrait. It contains several layers that have been manipulated in photoshop. I feel that it looks OK as a digital image on screen, but there is just something so nice about the over saturation feel of the ink jet print quality that just seems to help the overall aesthetic of this. Of course I am biased as the creator of it.. haha. Will this piece make the NFT cut? Perhaps? Lets see what it led to below.


The image above follows the same idea as the wood piece up at the top of this post. This is also an ink-jet print out that I cut up into fragments and covered in clear packing tape. I used loops of duct tape to hold the pieces and parts together onto the wall. It helps that wall is also made of painted brick and that its pretty old.. vintage aesthetics man.. When I first made this piece I felt that it was really missing something and or was just too busy for the eye to follow, but my IG peeps seemed to love it and also supported the piece as it was, and I don’t mind being wrong at all! I love it now, and its good to share where the original came from as this piece was purely digital at the start, made in 2017 and never printed or displayed off of a “screen”. See below.


The moral of this story, there is definitely a lot of value still in print, remixing and reviving older works. We have repositories of images from our own work.. Especially for works that are purely digital and for works that are purely applied. Seeing the work in the opposite context creates a good tension that will usually result in the making of new work! The work may surprise you more than you think! OK, so now Im off to make some 3D models of these for Virtual Reality :))))