Category: Teaching Resources

CT101-Digital Storytelling has Arrived on the Commons!

Its TRUE!

The wait is over! NET-ART’s infamous companion course: “CT101 Digital Storytelling” is now officially taking place here on the Commons! We are excited to bring the course in its full entirety here beginning this coming Fall 2020 semester. Two new  sections of CT101 will be contributing as authors of the site.

Hey, not to fret, they will also continue to submit collaborative work here on the NET-ART site as well.. (I saw your right eyebrow raise!) The CT101 Digital Storytelling community is vast and has a passion for creative experimentation, open source learning and pedagogy. 

Hold up… I know what you are thinking! “Prof, will there be more GIFS?” “Will there be more tutorials, how-to’s and collaborations?” “Will there be more blogging?” So it will be! (do the best Yoda impression you have)

See you soon!

Paper, Light, Shadow & Storytelling – Lets make a Paper Sculpture.

an ephemeral paper sculpture photographed in black and white

How-to make an Ephemeral Paper Sculpture.. from Home!

Here is a fun tutorial that you can follow along with (from home) through this post. This blog post is both the assignment and the example for how you may choose to create and publish your own work. This is part 1 of the process for the creation aspect of things, I will publish a “Part 2” with another tutorial for creatively pushing the documenting of the art work in a few ways. Feel free of course to improvise with any additional materials or hack the whole project to expand your own examples and storytelling. The goal is to publish your process and narrative into a compelling sequence of events!

*Please e-mail a selection of your best final images to rseslow@york.cuny.edu – a collaborative image gallery will reside on this website.

Paper, Light, Shadow & Storytelling – Lets make a Paper Sculpture.

First, the essence of the project is to create and investigate 3D form through storytelling. The form(s) that we make will serve as the content for your blog post. Lets put an emphasis on making a “subjective form”. We can get great practice in by narrating and detailing our steps. We can do this with some pretty common household materials too. Lets jump in! Grab some standard typing/printing paper, tape, a glue stick, a pair of scissors, a wall or table top surface and an external light source (flashlight). Let’s ask ourselves: “self, what are the potentials of form using paper, shadow and light by generating “a new forms” into existence through our creative immediacy? In my example below Im using a relief application by adhering my pieces to the wall, but you can also work on another flat plane if you wish. Keep the word “perspective” in mind as the documentation process plays a big role later on. 

As we scroll below the images will begin to “paint a picture” of the process but we can help it along and make it more compelling by the “way” that we assert the process. Adding your personality and sense of humor is certainly one option. We can also apply accessibility and inclusion by adding text to support the images. We can do this both below the image and placed into the “alt-text” area when we “edit” the image itself. 

Notice, Im using a simple shape, a circle, and Im altering its height by applying scale variations to my individual pieces. Subtle variations go a long way. So do multiple units of one single shape. Oh, and photography plays a big role in capturing your work in progress and the final outcomes as the sculpture itself is ephemeral… or is it?

Artist references – What artists work with or have worked with paper? 

Li Hongbo, Felix Semper, Elsa Mora, Kara Walker (and many more, what did you discover?)

Jump in! (Im going to project some fun colorful light sources on this same piece once it gets dark tonight).

Have fun and be sure to publish your post here on the Commons – add your URL here in the comments section below!

*PS –*Please e-mail a selection of your best final images to rseslow@york.cuny.edu – a collaborative image gallery will reside on this website.

*Part 2 will also publish on this blog soon!

Gather your materials - image of a cutting mat (cardboard also works) transparent tape, a glue stick(bond version), a pair of scissors, an X-Acto knife and some regular printing paper.

  1. Gather your materials – a cutting mat (cardboard also works) transparent tape, a glue stick(bond version), a pair of scissors, an X-Acto knife and some regular printing paper.

Image sharing how to cut your paper into strips (as many as you would like, but think of at least 10 or more) using the X-Acto knife or the scissors, apply the glue stick to the edge of one side of the strip that you have cut

2. Cut your paper into strips (as many as you would like, but think of at least 10 or more) using the X-Acto knife or the scissors, apply the glue stick to the edge of one side of the strip that you have cut.

Image showing how to carefully fold over the paper and apply pressure to the edge as it meets the glue. Hold in place for a few seconds.

3. Carefully fold over the paper and apply pressure to the edge as it meets the glue. Hold in place for a few seconds.

Image shows the Cut strip of transparent tape and from it into a loop. (you will be repeating this process)

4. Cut a strip of your transparent tape and from it into a loop. (you will be repeating this process)

image of one of the circular forms cut from paper

5. Once the circular form is ready, place the loop of transparent tape to the same side where you joined the two ends of your paper.

an image of the tape applied to the form - and repeat the process as needed to start composing your fragments.

6. Apply the tape and repeat the process as needed to start composing your fragments.

This is an image example of the various individual pieces that I cut out and glued together - they consist of various heights and diameters, this is called Scale and it created variation

7. This is an example of the various pieces that I cut out and glued together. Notice, they consist of various heights and diameters, this is called Scale and it creates variation.

Image shares the composing process by organizing and adhering your pieces. (Your first idea is NOT your only idea so play around with this a bit).

8. Begin the composing process by organizing and adhering your pieces. (Your first idea is NOT your only idea so play around with this a bit).

image shows the additive process - keep adding more pieces.

9. Add more pieces.

image shows the additive process - keep adding more pieces.

10. Keep Going!

image shows the additive process - keep adding more pieces.

11. Looking good, add more!

the final outcome image!

12. Finished! I used all of my pieces and took this image with the natural light that was present at the time.

the final outcome image with a dark lighting effect

13. You can certainly see that LIGHT plays a role in the enhancement of the mood and overall aesthetic… what will you do?


*OK if you made it this far, here is a teaser from the light projection captures! Coming soon!

an image of the paper sculpture with a purple light source projected onto the piece


How to Caption iOS Device Videos

a visual step by step map on how to make iphone videos accessible for the Deaf and hard of hearing

How to Caption iOS Device Videos

How to caption a mobile/ smartphone video, it’s NOT hard people. Are you using an iOS device? iPhone or iPad ? Lets start with iOS devices first – here is a walk through the process..

1. Locate and Open the Free “CLIPS” app that comes with your device. Start a new video.

2. Touch / tap on the “Chat Bubble” icon in the bottom left hand corner.

3. Choose your STYLE of Captions..

4. Record your now Accessible video and share it – be proud of your NEW awareness and repeat this process every time that you speak and make a video.

Absence of Presence, 8 Scenes from the Quarantine..

(please click on an image above to expand the gallery)

Absence of Presence, 8 Scenes from the Quarantine..

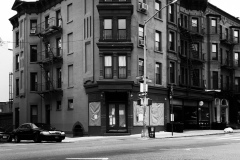
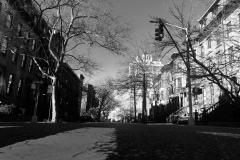
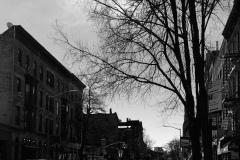
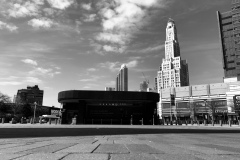
I write this on April 18th at 3:55 PM, Brooklyn, NYC. I would like to share this small series of images with the intention of expressing the perplexing absence of presence that has become ever so much more, well.. present. The images have a date range taken from Tuesday, March 10th through Thursday, April 16th 2020. Wednesday, March 11th was my last day of face to face teaching as CUNY did not shut down officially until Thursday March 12th. I had an evening class on Wednesday, March 11th that runs from 5:30 PM – 9:15 PM. Only 4 students out of 25 showed up that night. Upon arriving at my classroom, I realized that the chancellor had made an official shut-down announcement that went out via e-mail and text-alert at 5 PM. We all went home after a very very brief discussion and shared the same confused sentiment.

The images above are apart of my daily transportation routine. A walking routine that has been disrupted, shut-down and replaced. I say that with conviction, it is rightfully so at this time. The images above were all taken with my iPhone 8 using the Noir filter that is a part of the default camera setting. Most of the images were taken upon immediacy from an inner nudge. The images are about the metaphor of perspective and making a connection between extreme contrasts in one’s normal visual space. However, “space” itself is also an inner thing, there is just as much inner space inside of us. Are we beginning to fill it differently and look at it taking on a new awareness? I am, are you?

This experience has reminded me, as it has before, and will continue to again and again; “expect the unexpected.” The word “life” in all of its wonders and all of its cliche’s pokes at me over and over as I stay home and ride the hills and valleys of my psychology. Not all of this is bad, we must find the sliver lining both individually and collectively. We need to feel and emote and share and help, and then repeat that process as this situation will continue for a while.

Things can change so quickly, and so suddenly, the images above are a reminder. 

The NET-ART Prof’s Take on Things..

( GIF via @giphy )

The Net-Art community runs far and wide here on the commons! I wanted to issue a statement that assists both my York & BMCC students both current and alumnus, as well as the general community of peeps checking in and contributing regularly.

So, here we are entering our second week back to classes at CUNY and adapting to our “new lives.”- I cant think of anything else to call it as of right now, so Im going with this. I say this from the perspective of integration as Im very much still in the: “Im really perplexed about how we are even in the position that we are in phase” along with having made and fulfilled so many new and mandated compliances to keep my courses going simultaneously. (That was a long sentence, too.)

Along with following all of the administrative protocol, endless zoom meetings, course updates, the reformatting-ness of everything and the staggering amount of e-mail and overall communication.. (not including connecting with family and friends) Whew, Im finally starting to reflect on things. Or wait, is my ego reflecting on what it thinks it is reflecting on? Reflection invites in ALL of the emotions and the feelings both positive and negative. And, it has been quite a bit of negative! Why am I reminded of past failures at a time like this?? We humans like routines, it helps us stay focused and structured. Uncertainty is not something we are really good at, right? Right?! OK, I produced our CT101 and MMA100 course Continuity plans for the students in this semester’s classes, I hope that it helps. Does it? Please let me know in the comments section below. If you haven’t read it for your class, please click below:

Updated CT101 – Digital Storytelling Continuity Plan here <–

Updated MMA100 – Graphic Design Continuity Plan here  <-

The NET-ART Continuity plan follows a similar flow as stated above. (I got you on this)

I know, those posts above hold a lot of information for how our classes will proceed. As I mentioned, I have put a lot of thought into how this all should proceed, but I realize, “should” is not a great word to begin with.. as things change here in NYC and around the world there may be more pivots made to re-adjust and help students adjust to the circumstances.

Im here to help, please communicate with me and let me know what I can do to help you.

( GIF via @giphy )

Can we really look at our courses: “CT101- Digital Storytelling” or “MMA100” or any of our other courses the same way? I see it as this now:

“The-name-of-your-course/ in relationship to the global pandemic CoronaVirus.”

Our first assignment moving forward is an opportunity to express this, I placed this on the individual class calendars last Thursday. Some of the responses are coming in, and they are super on point!

NET-ART-ites:

*Blog Post assignment – Please write a new blog post that expresses your feelings, concerns, frustrations and related-otherness about the current state of affairs with the CoronaVirus pandemic. How has this impacted your semester thus far? How do you feel about moving forward with our class as an online entity?

I have also thought a lot about the amount of resources that people are sharing, there is just so much being shared! First and foremost some Wi-Fi:

U.S Providers Offering FREE Wi-Fi or Special Accommodations for 60 Days (via Sara Vogel)

https://docs.google.com/document/d/1kjVFeWefjnEfUrCR2yXxOvsp6_rDOfaMivUEiaBreiA/mobilebasic

And, Adobe Software for the remainder of the semester (not required – but if you need or want it) –

Term-active CUNY students can now download Adobe Creative Cloud applications to their personal devices. Students can go to https://creativecloud.adobe.com and use their CUNY Login username to authenticate and select which Adobe Creative Cloud applications to install.

The student instructions on Accessing Adobe Creative Cloud are available online and will be available from the IT Resources for Remote Work & Teaching page.

And Other resources – Pixlr (is a free web based photoshop alternative) – https://pixlr.com/editor/

Please stay safe everyone!

See you all on Zoom for brief meetings, or via e-mail, text, chat,  or here on this site – please keep in touch!

rseslow@york.cuny.edu

(BE-Yon-d) How to Write Your MFA Thesis in Art (And Beyond)

(Be-Yond) How to Write Your MFA Thesis in Art (And Beyond)

OK, so, its time for an update, perhaps this is a little bit over due? Compassion people, compassion.

The original title of this post is: “How to Write Your MFA Thesis in Fine Art (And Beyond)”, it remains the most visited and frequented blog post that I have written… ever. I originally published this “mini-guide” to my personal website in November of 2014. It remains in the top search results on the subject however something fun happened in recent years. When I later brought the paper over to the Academic Commons it quickly bypassed my personal website and resides as the top search result on google. So, Yay!

The post was written at a time when I was teaching an MFA thesis course between the years of 2011 – 2019. I believe that it still holds a ton of useful value. I want to stretch it further as I feel that this can help anyone with their writing practice. Apply the techniques for a blog post, an essay, a thesis and even the inspiration towards a dissertation. The keyword is practice –

Here is the original post below with a few adaptations for 2020..

I enjoy writing, and I find the process to be fun. Do you? I know that writing takes regular practice and it has always been an essential part of my learning process. Writing helps me to “see” and organize my thoughts. This allows me to edit and become clear about what it is I am expressing and or trying to say. Practicing writing helps me identify mistakes as well as further emphasize what I really want to explore and write about. When a topic of interest strikes me the process is effortless. I notice how I feel about the topic and this is a key factor as to how quickly I will get working on as essay, blog post or tutorial. This is something I have identified in myself over time and through repetition, how about you? Writing induces and activates new awareness. In my experiences as a college art professor, I have taken notice of a few consistent patterns when it comes to more formal writing, especially a final thesis deadline. For some, the thought of generating a final graduate thesis can be a daunting thought in and of itself. Associated with that thought may be an outdated feeling that your body still remembers. This outdated association can be especially frustrating to the point of extreme procrastination. If you are unaware that you are the cause of this feeling then you will continue to perpetuate it. Sound familiar? If you choose to enroll into an MFA program you will be required to write a final thesis. This will be an in depth description of your concepts, process, references, discoveries, reflections and final analysis. The best part of writing a final thesis is that the writer gets to create, format, define and structure the entirety of it. Throw away any pre-conceived and or outdated perceptions of what you think you should do. You must take responsibility for your writing the same way that you discipline yourself in the creation and production of your art work.

Where do you begin?

Your final thesis is an official archival record of what you have completed, explored and accomplished during the duration of your MFA program. Not only will your thesis be written for yourself, it will prove and back up your convictions, theories, assessments and statements for other people. It should be known that the content in this tutorial could also be applied to other writing needs that may be similar to the MFA thesis structure. An MA thesis or undergraduate BFA thesis can also easily follow this format. By all means, you can share it and remix it.

A regular writing practice must be established. This means, you will need to create a plan for how and when practice will take place. The calendar on your mobile device or the computer that you use will work just fine to remind you of these dates and times. Thirty minutes of practice twice a week can work wonders in the installation of a new habit. Are you up for that? Perhaps there is a way to make this decision seem effortless, keep reading.

You can get started right away. Technology in this area is very accessible and helpful. With use of a blogging platform such as word press one can privately or publicly begin their writing practice and archiving process. Even setting up a basic default blog will due just fine. You can always customize and personalize it later. If a blog does not interest you (but I do hope it does) a word processing document will due just fine. Either way, choosing to wait until your final semester to get started is a really bad idea and poor planning. Are there exceptions to this statement? Of course, and perhaps you will redefine my outlook, and prove me wring, but until I experience this from someone, lets make some longer-term plans.

I taught an MFA and MA thesis course from 2011-2019 at LIU Post in NY but this format transcended into my CUNY courses as well. The course put an emphasis on content and exposure to help students generate their final thesis. The course revolves around several exercises that contribute to the process as a whole broken down into individual isolated parts. Much like your thesis itself, this process is modular, meaning many parts will come and work together to make up the whole. One of the first exercises that I do with this class is identify a thesis template format. This is the basic structure that I have students brainstorm via a series of questions that I ask them. Keep in mind; you most likely already have a default version of this template. This could be the writing format that you learned in high school and had redefined by a professor in college. You may have been forced to use it or suffer the consequences of a poor grade solely on that formatting restriction. This feeling and program may still be running inside of you. So how do we deal with this? Together as a class we discuss and record the answers directly onto a chalkboard (a dry erase board or word document will also due just fine) I ask one of the students to act as the scribe to record the list manually while notes are individually taken also. I later put the information into a re-capped blog post on our class blog. Are you surprised that I use a blog for my class?

The Format-

The format for an MFA thesis in Fine Art (applied arts & digital) will in almost all cases coincide with a final thesis exhibition of completed works. This formats fits accordingly with the thesis exhibition in mind. This is a criteria break down of the structure of the paper. It is a simplified guide. Add or remove what you may for your personal needs.

  1. Description/Abstract: Introduction. A detailed description of the concept and body of work that you will be discussing. Be clear and objective, you need not tell your whole life story here. Fragments of your current artist statement may fit in nicely.
  2. Process, Materials and Methods: Here you will discuss the descriptions of your working processes, techniques learned and applied, and the materials used to generate the art that you create. Why have you selected these specific materials and techniques to communicate your ideas? How do these choices effect how the viewer will receive your work? Have you personalized a technique in a new way? How so? Were their limitations and new discoveries?
  3. Resources and References: Historical and cultural referencing, artists, art movements, databases, and any other form of related influence. How has your research influenced your work, ideas, and decision-making process? What contrasts and contradictions have you discovered about your work and ideas? How has regular research and exposure during your program inspired you? Have you made direct and specific connections to an art movement or a series of artists? Explain your discoveries and how you came to those conclusions.
  4. Exhibition Simulation: You will be mounting a final thesis exhibition of your work. How will you be mounting your exhibition? Why have you selected this particular composition? How did the space itself dictate your choices for installation? How will your installation effect or alter the physical space itself? Will you generate a floor plan sketch to accompany the proposed composition? If so, please explain, if not, also explain why? What kind of help will you need to realize the installation? What materials will you be using to install? Do you have special requirements for ladders, technologies and additional help? Explain in detail.
  5. Reflection: What have you learned over the course of your graduate program? How has the program influenced your work and how you communicate as an artist? What were your greatest successes? What areas do you need to work on? What skills will you apply directly into your continued professional practice? Do you plan to teach after you graduate? If so, what philosophies and theories will you apply into your teaching practice? Where do you see your self professionally as an artist in 3-5 years?

Individual Exercises to Practice-

The following exercises below were created to help practice and expand thinking about the thesis format criteria above. It is my intention to help my students actively contribute to their thesis over the course of the semester. The exercises can be personalized and expanded upon for your individual needs. I feel that weekly exercises performed with a class or one on one with a partner will work well. The weekly meetings in person are effective. Why? Having a classroom or person-to-person(s) platform for discussion allows for the energy of the body to expose itself. You (and most likely your audience) will take notice as to how you feel when you are discussing the ideas, feelings and concepts that you have written. Are you upbeat and positively charged? Or are you just “matter of fact” and lifeless in your verbal assertions? Writing and speaking should be engaging. Especially if it is about your work! The goal is to entice your reader and audience to feel your convictions and transcend those feelings directly. Awareness of this is huge. It will help you make not only edits in your writing but also make changes in your speaking and how you feel about what you have written.

  1. The Artist Interview– Reach out to a classmate or an artist that you admire. This could also be a professor, faculty member, or fellow classmate. It should be one that you feel also admires or has interest in your work if possible. Make appointments to visit each other in their studios or where ever you are creating current work. This can even be done via video chat on Skype, a Google hang out or face-time if an in person visits cannot be made. In advance prepare for each other a series of 15-20 questions that you would like to ask each other. Questions can be about the artist’s concepts, materials, process, resources and references about their works. Questions may be about how they choose to show or sell their work. Personal questions about the artist’s outlook on life, business, and wellbeing may come to mind and may also be considered. Record and exchange each other’s responses in a written format. You will make a copy for yourself to retain. Re-read and study your responses to the questions that the artist asked you. This will be helpful for you to read your spoken words coming from another format of communication. Do you find that you speak the same way that you write? Where do these words fit into the thesis criteria format above?
  2. The Artist Statement & Manifesto– Of course this will change and evolve over time but it is a necessary document that you will update each year as you evolve and grow. In one single page generate your artist statement or manifesto. Who are you? What is your work about? What are you communicating with your current work, projects and why? Who is your audience? How is your work affecting your audience, community and culture? Manifestos are usually published and placed into the public so that its creator can live up to its statements. Are you living up to yours? Keeping this public is a good reminder to walk your talk. Where do these words fit into the thesis criteria format above?
  3. Reactive Writing– Create a regular online space, document or journal to generate a chronological folio of reactive writing. Visit museums, galleries, lectures and screenings regularly. If you live outside of a city this may require a bit of research, but if you are in NYC this is all too easy. Bring a sketchbook and take notes! For each experience share your impressions, thoughts, feelings and reactions. Describe what you witness. Be objective down to the smallest details that have stayed with you. Reflect and find similarities and contrasts to what you are working on. Use this exercise as a free writing opportunity. Write with out editing or with out any formatting restrains, just express yourself in the immediacy that you feel about your experiences. At the end of each month (or designate a class for this aspect of the exercise) sit down and re-read your passages. Select the reaction(s) that you resonate with the most. Edit and format this selection into a more formal essay paying proper attention to a formatting style, grammar, punctuation and spelling. Where do these words fit into the thesis criteria format above?
  4. Tutorials & How To Guides– Writing tutorials and how-to guides are great ways to practice getting really clear about what you are doing. It helps you cultivate your vocabulary and describe the actions that you are performing with specific detail. It puts you in a position to list your steps, process, materials, and references and explain what the contributing contextual aspects are. Try this with a specific project or with the art that you are currently creating. Are you painter? Explain how you create a painting from start to finish. This includes the very first spark that inspires the idea for the painting, as well as how it will be installed, packaged, transported and exhibited. Details matter. Are you sculptor working in woodcarving? Explain the process from start to finish. Ask a fellow artist if you can sit in on his or her process and record what you experience. This is a really fantastic and fun exercise. It also contributes greatly to creating lesson plans for teaching. (I’m actually obsessed with this exercise a little bit.) Where do these words fit into the thesis criteria format above?
  5. Reviews & Critiques– Much like the reactive writing exercise above, generating reviews and critiques will foster great ways to find insight into your own work. With regular practice you will find common threads of thought and subject matter. You will discover similar referencing and contrasts. This can easily be done in two ways. You can visit specific museums, galleries, lectures and screenings to write about that excites you. This already puts a positive charge on the act of writing itself. I also suggest that you contrast this with subject matter and content that also does not agree with you. We want to be able to fully express what we do not like as well. Understanding why helps us become clear in our choices. Understanding this helps strengthen our position on what we do want to write about and what we want our audience to understand. It allows us to explore dichotomies. The second way to further exercises in writing reviews and critiques is to speak about them. Speaking about art in person is a great way to further the clarification of you writing. Where do these words fit into the thesis criteria format above?

Further Experimentation-

The spoken word versus the act of writing? I have come across many students and colleagues who find that they write much differently than they speak. I feel that writing needs to have a consistent flow and feel fluid to keep its reader(s) engaged. Speaking well and articulating oneself clearly is also something that takes practice. I have found that sometimes recording my words and thoughts via a voice transcribing application is helpful to get ideas out and into a more accessible form. A lot of transcribing software is free for most mobile devices. Much like voice recording the powerful enhancement is to see your words take form after you have said them. You can simply copy and paste the text and edit what is valuable.

This essay is also a work in progress. It’s an ongoing draft in a published format that I will continue updating with new content and fresh ways to simplify the exercises.

I appreciate your feedback!

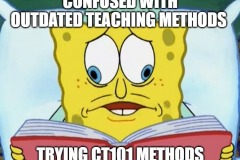
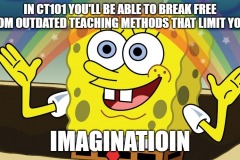
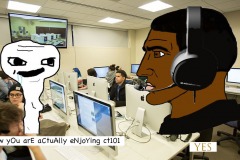
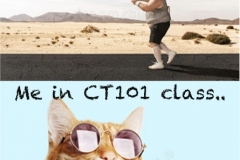
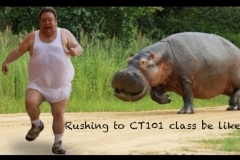
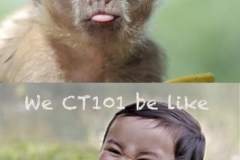
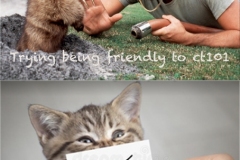
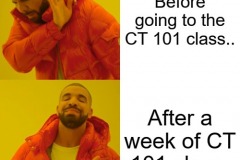
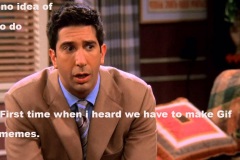
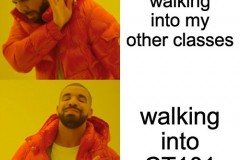
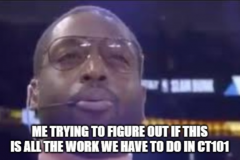
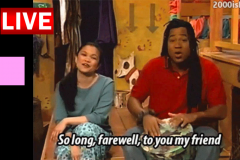
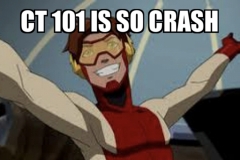
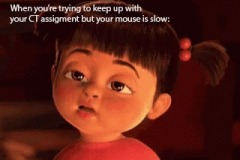
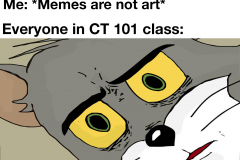
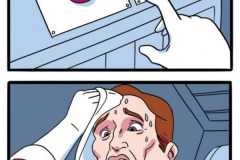
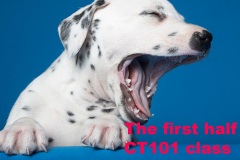
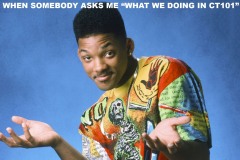
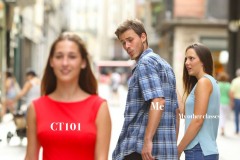
Reacting to York College’s CT101 in MEMEs!

Are Internet Memes ART?

CT101 – Digital Storytelling students at York College are always up for the challenge!

(Screen the video above first and read the articles below, its context, it helps!)

Further, then, do an internet search for “Are memes ART?” See what you discover.. Oh, you will be surprised. No matter how you cut it, memes are here to stay…is this good or bad for Art? Is this good or bad for Education? Is there context for memes and appropriate application in your course or courses? If so, where and how do you start? We wanted to investigate, and so we did.

We would like to know what you think. And by all means, share you favorites via URLs, and or create your own as a reaction..

Are Memes the Pop Culture Art of our Era? Kate Knibbs – https://www.digitaltrends.com/social-media/when-does-a-meme-become-art/

Another piece with some good insights – http://www.dazeddigital.com/artsandculture/article/34645/1/is-2017-the-year-that-memes-are-recognised-as-art

Please leave your reactions in the comments section below. We dare you!

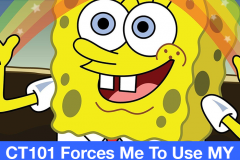
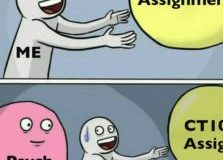
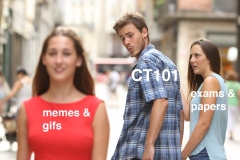
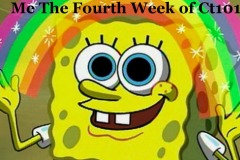
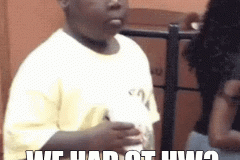
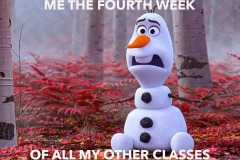
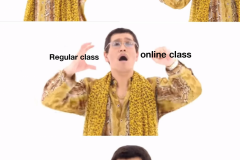
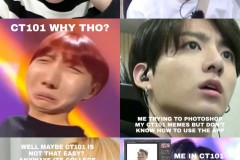
The gallery below is our spring 2020 first iterations of Memes that express a simple contemplation: “How do you feel about your CT101 class so far? (After week #4) The gallery speaks for itself. 

By the way, students were also introduced to adobe photoshop. The memes were created as an introduction to basic design layout and applying text to an image. Typesetting is a skill and learning how to apply type to unify a composition takes a lot of practice. Practice, practice. 🙂

Net-Art Open Call for Submissions! Spring 2020 Edition!
The NET-ART OPEN-CALL for Submissions continues this semester!

Spring 2020 Edition

What does this mean? What is NET-ART on the Commons?

The NET-ART 2020 academic calendar is now accepting submissions on a rolling proposal basis in the following criteria:

  1. Electronic Media / Experimental Pedagogy
  2. Animated GIFS
  3. Digital Art
  4. VIDEO ART / Experimental Film
  5. NET-ART (Works created and displayed in a web browser)
  6. Class / Course Collaboration
  7. Digital & Analog ZINEs
  8. Curatorial (A Curated Group Exhibition)
  9. Solo Exhibitions
  10. Net-Art Open Projects – (details here)
  11. “Experimental Such-ness” (e-mail for details)

Looking for useful tools, apps & tutorials to get your submission started? CLICK HERE!

Looking for examples of “what” has been submitted previously? Explore here!

The NET-ART Submission Guidelines:

Submissions may be generated by CUNY faculty, students of all levels, alumni & community members. CUNY classes/courses may also submit collaborative proposals as a group. CUNY faculty & students may also collaborate with others from outside of CUNY as well.

All submitted works will be featured and published as individual blog posts as well as added to existing galleries on the NET-ART website.

Depending on the submission’s proposal, relevant and in context, various submissions will be published and exhibited as an individual page created specifically for the project.

All submissions should be described in written detail with a clear vision, context and meaning. Supporting images and links should be provided as well.

Authors of the submissions and their collaborators must be willing to participate, respond to comments and expand upon their projects with incoming queries via the commons, twitter and beyond.

The purpose of exhibiting submissions in various categories displays a platform for creative and experimental methods of pedagogy. Please consider how your work will contribute to a larger whole that will be archived for teaching, learning, reference and posterity.

We anticipate your submissions!

Question, Proposals & Submissions can be sent via e-mail or via Twitter to:

rseslow@york.cuny.edu  /  @ryanseslow