Category: Reactive Writing Assignments

(BE-Yon-d) How to Write Your MFA Thesis in Art (And Beyond)

(Be-Yond) How to Write Your MFA Thesis in Art (And Beyond)

OK, so, its time for an update, perhaps this is a little bit over due? Compassion people, compassion.

The original title of this post is: “How to Write Your MFA Thesis in Fine Art (And Beyond)”, it remains the most visited and frequented blog post that I have written… ever. I originally published this “mini-guide” to my personal website in November of 2014. It remains in the top search results on the subject however something fun happened in recent years. When I later brought the paper over to the Academic Commons it quickly bypassed my personal website and resides as the top search result on google. So, Yay!

The post was written at a time when I was teaching an MFA thesis course between the years of 2011 – 2019. I believe that it still holds a ton of useful value. I want to stretch it further as I feel that this can help anyone with their writing practice. Apply the techniques for a blog post, an essay, a thesis and even the inspiration towards a dissertation. The keyword is practice –

Here is the original post below with a few adaptations for 2020..

I enjoy writing, and I find the process to be fun. Do you? I know that writing takes regular practice and it has always been an essential part of my learning process. Writing helps me to “see” and organize my thoughts. This allows me to edit and become clear about what it is I am expressing and or trying to say. Practicing writing helps me identify mistakes as well as further emphasize what I really want to explore and write about. When a topic of interest strikes me the process is effortless. I notice how I feel about the topic and this is a key factor as to how quickly I will get working on as essay, blog post or tutorial. This is something I have identified in myself over time and through repetition, how about you? Writing induces and activates new awareness. In my experiences as a college art professor, I have taken notice of a few consistent patterns when it comes to more formal writing, especially a final thesis deadline. For some, the thought of generating a final graduate thesis can be a daunting thought in and of itself. Associated with that thought may be an outdated feeling that your body still remembers. This outdated association can be especially frustrating to the point of extreme procrastination. If you are unaware that you are the cause of this feeling then you will continue to perpetuate it. Sound familiar? If you choose to enroll into an MFA program you will be required to write a final thesis. This will be an in depth description of your concepts, process, references, discoveries, reflections and final analysis. The best part of writing a final thesis is that the writer gets to create, format, define and structure the entirety of it. Throw away any pre-conceived and or outdated perceptions of what you think you should do. You must take responsibility for your writing the same way that you discipline yourself in the creation and production of your art work.

Where do you begin?

Your final thesis is an official archival record of what you have completed, explored and accomplished during the duration of your MFA program. Not only will your thesis be written for yourself, it will prove and back up your convictions, theories, assessments and statements for other people. It should be known that the content in this tutorial could also be applied to other writing needs that may be similar to the MFA thesis structure. An MA thesis or undergraduate BFA thesis can also easily follow this format. By all means, you can share it and remix it.

A regular writing practice must be established. This means, you will need to create a plan for how and when practice will take place. The calendar on your mobile device or the computer that you use will work just fine to remind you of these dates and times. Thirty minutes of practice twice a week can work wonders in the installation of a new habit. Are you up for that? Perhaps there is a way to make this decision seem effortless, keep reading.

You can get started right away. Technology in this area is very accessible and helpful. With use of a blogging platform such as word press one can privately or publicly begin their writing practice and archiving process. Even setting up a basic default blog will due just fine. You can always customize and personalize it later. If a blog does not interest you (but I do hope it does) a word processing document will due just fine. Either way, choosing to wait until your final semester to get started is a really bad idea and poor planning. Are there exceptions to this statement? Of course, and perhaps you will redefine my outlook, and prove me wring, but until I experience this from someone, lets make some longer-term plans.

I taught an MFA and MA thesis course from 2011-2019 at LIU Post in NY but this format transcended into my CUNY courses as well. The course put an emphasis on content and exposure to help students generate their final thesis. The course revolves around several exercises that contribute to the process as a whole broken down into individual isolated parts. Much like your thesis itself, this process is modular, meaning many parts will come and work together to make up the whole. One of the first exercises that I do with this class is identify a thesis template format. This is the basic structure that I have students brainstorm via a series of questions that I ask them. Keep in mind; you most likely already have a default version of this template. This could be the writing format that you learned in high school and had redefined by a professor in college. You may have been forced to use it or suffer the consequences of a poor grade solely on that formatting restriction. This feeling and program may still be running inside of you. So how do we deal with this? Together as a class we discuss and record the answers directly onto a chalkboard (a dry erase board or word document will also due just fine) I ask one of the students to act as the scribe to record the list manually while notes are individually taken also. I later put the information into a re-capped blog post on our class blog. Are you surprised that I use a blog for my class?

The Format-

The format for an MFA thesis in Fine Art (applied arts & digital) will in almost all cases coincide with a final thesis exhibition of completed works. This formats fits accordingly with the thesis exhibition in mind. This is a criteria break down of the structure of the paper. It is a simplified guide. Add or remove what you may for your personal needs.

  1. Description/Abstract: Introduction. A detailed description of the concept and body of work that you will be discussing. Be clear and objective, you need not tell your whole life story here. Fragments of your current artist statement may fit in nicely.
  2. Process, Materials and Methods: Here you will discuss the descriptions of your working processes, techniques learned and applied, and the materials used to generate the art that you create. Why have you selected these specific materials and techniques to communicate your ideas? How do these choices effect how the viewer will receive your work? Have you personalized a technique in a new way? How so? Were their limitations and new discoveries?
  3. Resources and References: Historical and cultural referencing, artists, art movements, databases, and any other form of related influence. How has your research influenced your work, ideas, and decision-making process? What contrasts and contradictions have you discovered about your work and ideas? How has regular research and exposure during your program inspired you? Have you made direct and specific connections to an art movement or a series of artists? Explain your discoveries and how you came to those conclusions.
  4. Exhibition Simulation: You will be mounting a final thesis exhibition of your work. How will you be mounting your exhibition? Why have you selected this particular composition? How did the space itself dictate your choices for installation? How will your installation effect or alter the physical space itself? Will you generate a floor plan sketch to accompany the proposed composition? If so, please explain, if not, also explain why? What kind of help will you need to realize the installation? What materials will you be using to install? Do you have special requirements for ladders, technologies and additional help? Explain in detail.
  5. Reflection: What have you learned over the course of your graduate program? How has the program influenced your work and how you communicate as an artist? What were your greatest successes? What areas do you need to work on? What skills will you apply directly into your continued professional practice? Do you plan to teach after you graduate? If so, what philosophies and theories will you apply into your teaching practice? Where do you see your self professionally as an artist in 3-5 years?

Individual Exercises to Practice-

The following exercises below were created to help practice and expand thinking about the thesis format criteria above. It is my intention to help my students actively contribute to their thesis over the course of the semester. The exercises can be personalized and expanded upon for your individual needs. I feel that weekly exercises performed with a class or one on one with a partner will work well. The weekly meetings in person are effective. Why? Having a classroom or person-to-person(s) platform for discussion allows for the energy of the body to expose itself. You (and most likely your audience) will take notice as to how you feel when you are discussing the ideas, feelings and concepts that you have written. Are you upbeat and positively charged? Or are you just “matter of fact” and lifeless in your verbal assertions? Writing and speaking should be engaging. Especially if it is about your work! The goal is to entice your reader and audience to feel your convictions and transcend those feelings directly. Awareness of this is huge. It will help you make not only edits in your writing but also make changes in your speaking and how you feel about what you have written.

  1. The Artist Interview– Reach out to a classmate or an artist that you admire. This could also be a professor, faculty member, or fellow classmate. It should be one that you feel also admires or has interest in your work if possible. Make appointments to visit each other in their studios or where ever you are creating current work. This can even be done via video chat on Skype, a Google hang out or face-time if an in person visits cannot be made. In advance prepare for each other a series of 15-20 questions that you would like to ask each other. Questions can be about the artist’s concepts, materials, process, resources and references about their works. Questions may be about how they choose to show or sell their work. Personal questions about the artist’s outlook on life, business, and wellbeing may come to mind and may also be considered. Record and exchange each other’s responses in a written format. You will make a copy for yourself to retain. Re-read and study your responses to the questions that the artist asked you. This will be helpful for you to read your spoken words coming from another format of communication. Do you find that you speak the same way that you write? Where do these words fit into the thesis criteria format above?
  2. The Artist Statement & Manifesto– Of course this will change and evolve over time but it is a necessary document that you will update each year as you evolve and grow. In one single page generate your artist statement or manifesto. Who are you? What is your work about? What are you communicating with your current work, projects and why? Who is your audience? How is your work affecting your audience, community and culture? Manifestos are usually published and placed into the public so that its creator can live up to its statements. Are you living up to yours? Keeping this public is a good reminder to walk your talk. Where do these words fit into the thesis criteria format above?
  3. Reactive Writing– Create a regular online space, document or journal to generate a chronological folio of reactive writing. Visit museums, galleries, lectures and screenings regularly. If you live outside of a city this may require a bit of research, but if you are in NYC this is all too easy. Bring a sketchbook and take notes! For each experience share your impressions, thoughts, feelings and reactions. Describe what you witness. Be objective down to the smallest details that have stayed with you. Reflect and find similarities and contrasts to what you are working on. Use this exercise as a free writing opportunity. Write with out editing or with out any formatting restrains, just express yourself in the immediacy that you feel about your experiences. At the end of each month (or designate a class for this aspect of the exercise) sit down and re-read your passages. Select the reaction(s) that you resonate with the most. Edit and format this selection into a more formal essay paying proper attention to a formatting style, grammar, punctuation and spelling. Where do these words fit into the thesis criteria format above?
  4. Tutorials & How To Guides– Writing tutorials and how-to guides are great ways to practice getting really clear about what you are doing. It helps you cultivate your vocabulary and describe the actions that you are performing with specific detail. It puts you in a position to list your steps, process, materials, and references and explain what the contributing contextual aspects are. Try this with a specific project or with the art that you are currently creating. Are you painter? Explain how you create a painting from start to finish. This includes the very first spark that inspires the idea for the painting, as well as how it will be installed, packaged, transported and exhibited. Details matter. Are you sculptor working in woodcarving? Explain the process from start to finish. Ask a fellow artist if you can sit in on his or her process and record what you experience. This is a really fantastic and fun exercise. It also contributes greatly to creating lesson plans for teaching. (I’m actually obsessed with this exercise a little bit.) Where do these words fit into the thesis criteria format above?
  5. Reviews & Critiques– Much like the reactive writing exercise above, generating reviews and critiques will foster great ways to find insight into your own work. With regular practice you will find common threads of thought and subject matter. You will discover similar referencing and contrasts. This can easily be done in two ways. You can visit specific museums, galleries, lectures and screenings to write about that excites you. This already puts a positive charge on the act of writing itself. I also suggest that you contrast this with subject matter and content that also does not agree with you. We want to be able to fully express what we do not like as well. Understanding why helps us become clear in our choices. Understanding this helps strengthen our position on what we do want to write about and what we want our audience to understand. It allows us to explore dichotomies. The second way to further exercises in writing reviews and critiques is to speak about them. Speaking about art in person is a great way to further the clarification of you writing. Where do these words fit into the thesis criteria format above?

Further Experimentation-

The spoken word versus the act of writing? I have come across many students and colleagues who find that they write much differently than they speak. I feel that writing needs to have a consistent flow and feel fluid to keep its reader(s) engaged. Speaking well and articulating oneself clearly is also something that takes practice. I have found that sometimes recording my words and thoughts via a voice transcribing application is helpful to get ideas out and into a more accessible form. A lot of transcribing software is free for most mobile devices. Much like voice recording the powerful enhancement is to see your words take form after you have said them. You can simply copy and paste the text and edit what is valuable.

This essay is also a work in progress. It’s an ongoing draft in a published format that I will continue updating with new content and fresh ways to simplify the exercises.

I appreciate your feedback!

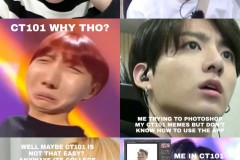
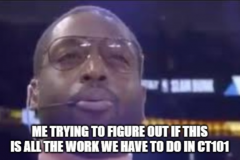
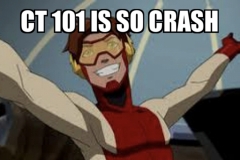
Reacting to York College’s CT101 in MEMEs!

Are Internet Memes ART?

CT101 – Digital Storytelling students at York College are always up for the challenge!

(Screen the video above first and read the articles below, its context, it helps!)

Further, then, do an internet search for “Are memes ART?” See what you discover.. Oh, you will be surprised. No matter how you cut it, memes are here to stay…is this good or bad for Art? Is this good or bad for Education? Is there context for memes and appropriate application in your course or courses? If so, where and how do you start? We wanted to investigate, and so we did.

We would like to know what you think. And by all means, share you favorites via URLs, and or create your own as a reaction..

Are Memes the Pop Culture Art of our Era? Kate Knibbs – https://www.digitaltrends.com/social-media/when-does-a-meme-become-art/

Another piece with some good insights – http://www.dazeddigital.com/artsandculture/article/34645/1/is-2017-the-year-that-memes-are-recognised-as-art

Please leave your reactions in the comments section below. We dare you!

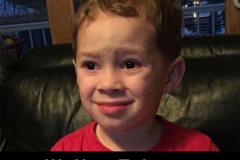
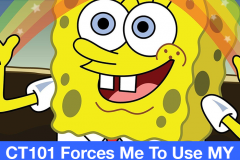
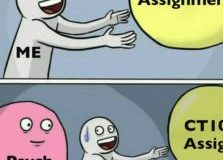
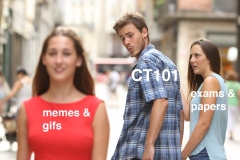
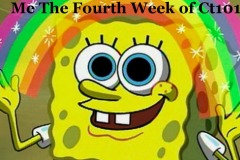
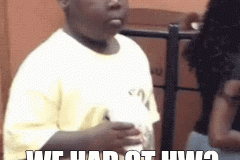
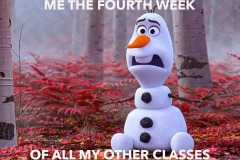
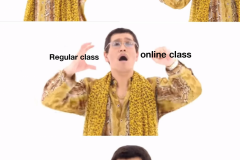
The gallery below is our spring 2020 first iterations of Memes that express a simple contemplation: “How do you feel about your CT101 class so far? (After week #4) The gallery speaks for itself. 

By the way, students were also introduced to adobe photoshop. The memes were created as an introduction to basic design layout and applying text to an image. Typesetting is a skill and learning how to apply type to unify a composition takes a lot of practice. Practice, practice. 🙂

The Cross College, Campus, Course ZINE Collab Project!

Project Title –  “The Cross College, Campus, Course ZINE Collab Project!”

Participating Courses & Campuses:

Professor Michelle McAuliffe’s :: – ART255, Digital Photography Class – Galluadet University, Washington, DC

Professor Ryan Seslow’s :: – CUNY York College, NYC, CT101, Digital Storytelling Class, CUNY, BMCC, NYC, Foundations of Digital Graphic Design Class, Touro College, Graduate School of Technology, NYC, Foundations & History of Design Class.

(4 different participating courses submitted works in total)

Description –

Welcome! This project is a collaborative open education exploration using design, digital tools, the creative human potential and the Internet. It is our intention to generate, discuss and fuse together disciplines through visual communication.

The “The Cross College, Campus, Course ZINE Collab Project” project synthesizes the disciplines of communication technology, graphic design, and digital storytelling courses across multiple campuses. Each course is given the same information and assignment (below) to complete from the perspective of their class content and personal experiences.

As individual courses, we are interested in knowing how traditional design principles relate and contrast with the medium of visual communication and storytelling (and vice versa). We want to understand and share how the use of integrated software applications and web tools translate when applied and presented in a public space. “Public space” has an interesting context both physically and virtually. We wanted to test both.

What will the results be both digitally and non-digitally-(Analog)?

How will the immediacy of publishing to the Internet and the contrast of using public library spaces to experience the same content effect the overall generating and receiving of the works?

What kind of dialog would this create? (This is the short list of questions, we have many more!)

This project begins today 11/12/2019 by introducing the specifications of the project and publicly inviting other professors, students and courses to join in! Are you interested?


PART 1 – Design

Design  SpecificationsLets simulate, You have been selected to contribute 1 page to a collaborative magaZINE that produces a rare publication in both a (DIY) Do it Yourself printed edition and an online digital version.


*Your submission to the publication will creatively communicate an illustration that displays how:

“Technology and creativity are powerful tools for fueling communication, inspiration, digital-storytelling and design.”

You have the creative freedom to produce and generate your contribution with full autonomy as to how you experience or define this statement above, however, your final submission should display an integrated composition of imagery (use of layers and opacity) along with descriptive verbiage that has been typeset creatively.


*Size Requirements – 8.5″ X 11″ inches vertical, please. (What is the potential of a rectangle?)

Usage of Imagery Participants should NOT randomly use images that are simply just found on the Internet, especially with-out proper attribution to its creator. Please refer to this resource page and work from the numerous repositories of public domain images and creative commons sources. (Yes, you can make your own images and use your own art work!)

Software Skill Showcase – Over the past weeks we have all toggled through learning various techniques and methods working with adobe photoshop and related design tools. All image related composing and manipulations should be generated in photoshop, or another image-making application that allows for a saved out-put as a .jpg or .png file.

Completed Submissions – 

1. I would like to ask all students and participants to publish their completed pages as a blog post describing the process and meaning of your completed page / contribution. You may write the post as a tutorial that maps your process from start to finish. You can then share the link to your individual post when you comment about the project below (in the comments area).

2. Students will save all of their design work and submit one file (.jpeg or .png image file) for both the digital zine publication here on the NET-ART website as well as a printed copy for the print version of the Zine.

( E-mail this file to me – rseslow@york.cuny.edu or rseslow@bmcc.cuny.edu )


The Galleries:


Professor Michelle McAuliffe’s – ART255, Digital Photography Class, Galluadet University, Washington, DC (below)


Professor Ryan Seslow’s – CUNY York College, NYC, CT101, Digital Storytelling Class, (below)


Professor Ryan Seslow’s – CUNY, BMCC, NYC, Foundations of Digital Graphic Design Class


Professor Ryan Seslow’s – Touro College, Graduate School of Technology, NYC, Foundations & History of Design Class (below)


Part 2 – Commenting & Dialog

In the comments section below: all students and participants will respond and react to both the project as a whole (yes, in the comments space directly below) and individually to each other’s submissions. You can click on an individual image in the gallery in this post on the piece that stands out to you and add your comments. (As submissions the come in they will appear starting the 1st week of December 2019).

The Academic Commons is a public platform and space for CUNY and beyond, the C.A.C commons community will also be invited to participate in commenting and creating dialog here. Feel free to invite others!

Please consider addressing the following questions in your comments:

*What common threads or similarities do you see between the submitted works?

*What differences do you see?

*How does seeing all of the works organized into one “space” enhance or disrupt your interpretation of the project and its outcome?

*How will apply this experience into your life? Where will this knowledge transcend for you?

*How do you think the general public will appreciate the project viewing it as a tangible object (the printed ZINES) rather than an online experience? Do you prefer one over the other? Please explain and describe your answers.  The printed zine will be donated to the NYPL’s Zine collection at their 5th Avenue & 42nd Street location – DeWitt Wallace Periodical Room at the Stephen A. Schwarzman Building 

as well also being available at the Libraries of each participating campus as of mid-spring of 2020. 


*Due dates –

All ART work Submissions must be received no later than Thursday December 5th, 2019.

All comments, reaction and discussion submissions must be completed below by Thursday December 12th, 2019.

Check out the previous examples from the last cross campus zine collab here! 

The same specifications were used, lets see how things have evolved in the last 2 years!

Have Questions? Reach out!


Why Should I Make a Portfolio?

Why Should I Make a Portfolio?

Wait, what exactly is a portfolio? There seems to be a context…or is there?

Let’s define it, and perhaps there is metaphoric value and context in each one of these “traditional definition” examples below..

According to Merriam-Webster’s Dictionary:

Definition of “portfolio”:

1a hinged cover or flexible case for carrying loose papers, pictures, or pamphlets

2: from the use of such a case to carry documents of statethe office and functions of a minister of state or member of a cabinet

3the securities held by an investorthe commercial paper held by a financial house (such as a bank)

4a set of pictures (such as drawings or photographs) usually bound in book form or loose in a folder

5a selection of a student’s work (such as papers and tests) compiled over a period of time and used for assessing performance or progress

Hold up, whoa! I can already feel your inner physiological triggers sending a bright red waving flag to your ego saying: “but making a portfolio is sooooo much work!”.

Guess what?

LET, AND ALLOW FOR THIS HAPPEN!

It is perfectly normal and alright to let your “old-portfolio-definition-self” bleed out. Exercise that energy. Let’s release it. Ill wait….Take a breath, and let’s remind ourselves that things need to be replaced and upgraded. Nothing is static. We learn, we grow, we expand and we can’t allow past experiences to drive the bus on new opportunities and new ways of seeing, experiencing and re-defining things. 

The word “portfolio” is not a bad word. If anything, like anything else, it’s a default term that officially requires your interaction, research, resonance and re-defining within context to who you are and who you are becoming in the process! With that said, let’s think about what the next step is in creating your new portfolio.

Let us understand the “why” part. Why do I need a portfolio? What is the purpose?

Here is a short list (feel free to add more to your updated definition)

  1. To showcase a body of your work. This is obvious, but curating and organizing things with intention becomes very specific. It activates a higher level of awareness and attention to the process / project. You will learn how to get selective, and this takes practice.

2. To show off your strengths, creativity, skills, effectiveness, efficiency, enthusiasm and passion! Of course, this energy translates directly through the work included in the portfolio. This will be what you believe is your best work at the time, but there is context. Keep reading.. (PS – it’s OK to have more than one portfolio to help showcase various bodies of works and projects.) For example, I’m an applied artist, a digital artist, animation-maker, graphic-designer and a professor of art and design. Some of the works in my portfolio can overlap in theory but I keep a lot of the works separate to subject, but enjoy showcasing them together on my website. That’s right, my website is my portfolio. In fact, I have created a few, the links are below to help.

3. Display your process and evolution. Duration is your friend! Nothing shows off progress better than time. A metric of growth shows itself through time. When I look back at the design work I was doing 10 years ago in comparison to today I see an incredible difference in skill, technique, taste and where my thinking and focus was at the time. I also find a lot of ideas that can be pushed and expanded upon with more with my “awareness-of-growth eyes.” I write a lot about my work and share my process. I believe that this helps me reflect and explain myself better.

4. Stand out and show your style and authenticity – There is only one “you” that you can be. Yes, we certainly learn and are greatly inspired and influenced by others, but at the end of the day we must learn how to be our authentic selves. We must learn how to translate that through our mediums of choice. How will you do this? The short answer is through consistent experimentation and practice. Over time you will create your inner curator, and that part of yourself will begin putting pieces together in groups and compartments. The process will build and flow. This aspect is a journey and it too is anything from static. I take great interest in making changes, learning new things and applying them to the foundations that I continue to build.


OK, all easier said than done… or is it you ask?

I hope that this post will inspire you to begin! Be patient with yourself. The goal is not to create a portfolio in one hour, and there is no such thing as “perfection”. or the perfect portfolio. Let’s produce a result and discuss that result. Be generous with yourself in the process. 

I admit it. I love to experiment, test, tweak, deconstruct, remix and repeat processes. I treat the creation process of such a task, creating a new portfolio, the same way that I approach making art. Suspend your judgement! Allow yourself to “make something that may really suck” as a first iteration. This is crucial to developing a contrast of your own. Again, you need to produce a result in order to make an assessment about the result. Until you do this, your contrast is someone else’s stuff / thing that has inspired or affected you.

I would like for you to consider both of these portfolio building and displaying options below. Im a huge fan of both the Academic Commons and the OpenLab platforms. (If you are reading this and are not a part of CUNY somehow, then you can easily follow along individually as both the commons and the OpenLab are powered by WordPress.) Using your own self-hosted WordPress based website and account via ReclaimHosting.com – I have created a sample and template / example using both the Academic Commons, OpenLab and my own self-hosted projects that go into the process. I consider all of these links below to be portfolios. Perhaps you have a preference over one or the other? I hope that these links below will help you get started.


Lets check out a few examples:

  1. A portfolio website “How-to” example using the CUNY Academic Commons: https://profryanseslow.commons.gc.cuny.edu/

2. A portfolio website “How-to” example using the OpenLab: https://openlab.bmcc.cuny.edu/portfolio-ryan-seslow/

3. My personal website- this is my own domain and my own self-hosted website (WordPress) – https://ryanseslow.com

4. This is also my own domain and a self-hosted website to showcase a body of work (WordPress) – https://Situationalfiction.com

5. Of course, the NET-ART website here on the commons also functions as a portfolio and online platform for various galleries, blog posts, online exhibitions and selected works. Take a tour.

6. Looking for more examples? Contact me, lets chat!


Feel free to leave your questions and feedback in the comments section below! Lets add to this post together!

Or contact me at – rseslow@bmcc.cuny.edu


Making a Portfolio/Project Website on the Commons

Im excited to share this blog post with you today (and beyond as it will be updated and archived). As you all know, I’m a big fan of the CUNY Academic Commons. There are more reasons than I can mention at the moment, but I wanted to take this opportunity to emphasize the idea of how essential and easy it is to create a portfolio on the platform. I know, the word “portfolio” itself has several internal triggers. We almost always associate it with “work” or a “job” and it is time to purge, bypass and rethink this. That part is OUR responsibility. Lets not forget the word “FUN” as a part of this process because it can be the driving force behind actually creating something that you are both proud of and eager to put out into the world- (our community here and beyond).

The URL for my example portfolio on the commons is herehttps://profryanseslow.commons.gc.cuny.edu

The portfolio site is designed as a visual tutorial that gives both suggestions and instructions, it will help you get started. Think of your visit to the site as inspiration on what some of the potentials can be. It is intended to be the fuel that sparks your ideas into action. I’m also here to help, so feel free to reach out. The example website can be applied to a professional faculty portfolio, a collaborative group project, a specific event or accomplishment. This can also easily be the template for your students, and student work, including helping students create their own variations. 

More to come! 


Back to Teaching Reminders from Net-Art

I would like to ask my fellow teaching colleagues far and wide to consider this information as you begin teaching your courses this fall.

Whether you are teaching 1 course or 7 (like myself), this applies to all.

Keywords – Patience, Empathy, Compassion, Creativity, Accessibility, Inclusion & Community

1. There is no ego in teaching. Be an example of patience, compassion, empathy and understanding. Make this your mantra. Your energy is contagious! Meaning, your vibration carries information to each and every person in the classroom. The emotional state of your vibration creates rapport between people. You can set the vibration for the semester in your first-class meeting by expressing your gratitude, excitement, appreciation and enthusiasm for teaching and meeting your new students. Again, this is contagious energy!

2. Take acute awareness that your course(s) holds all of the potential to be an incredibly unique learning experience in and of itself. I mean this far beyond any of the specific course content that will be covered throughout the semester. Acknowledge, we are all human beings coming into the course from various places and stages in our journey together on this planet. There is always a part of each and every one of us within each other. Whether it is an example of who you once were, relate to now, or a reflection of the future you to come. There you are.

3. Think about the fact that yourself, and the group of incoming students will be having a new experience in the same physical space, at the same time for the next 15 weeks. This experience, with the exact same people, in the exact same space and time frame will never happen again. Discuss and discover your similarities and collective strengths as a class and how those individual characteristics form the modular fragments that make up the whole. Every class is a community. It will function as one with great energy if it is declared collectively.

4. Create a community! Every course holds the potential to be platform for collaboration and community building. This means, setting up a series of dialogs early on for learning about each other. What are the passions, concerns and ambitions of each student, how are they taking steps to realize those things? Remind yourself before, during and after each class; what roll do you play as a leader and facilitator of inspiration for your students?

5. Realize, our students are teaching us far more than we are teaching them. (read that again if you need to) If you have a classroom of 20 students, then a minimum of 20 new potentialities, solutions, variations and iterations will be generated, worked on, crafted, discussed, written, spoken, presented uniquely and shared back to you (and the class itself) for each assignment. That is a tremendous amount of information and energy. Remember, there is no EGO in teaching, so whether these outcomes please your expectations or not, you have been exposed to a new opportunity to help, learn, grow and see things from another’s perspective. The sum total of awareness from openly experiencing things from another’s point of view is the diminishment of competition-based thinking, and the humble transition into seeing infinite creativity.

6. Do you really think that you are going to inspire your new students this semester by spending the first-class meeting time reading the entire syllabus? Place an emphasis on our collective human-ness first and foremost. Your class(s) are communities awaiting the declaration of its potentiality. Introductions should be the first thing that happens. Learn each other’s names, share stories, connect and learn about each other.

Keywords – Patience, Empathy, Compassion, Creativity, Accessibility, Inclusion & Community

Have a wonderful Semester, and feel free to add to this thread in the comments section below!

The Contemplation of Metaphoric Flight, A Creative Teaching Template

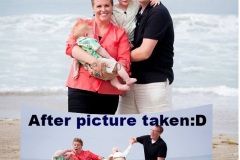
“We need a caption, Phil, I don’t want to disappoint Roz again, help me out here”
Countless memories, the sea air and the seemingly creative blunders of reflective such-ness..what will you contribute to the process?
This is a manipulated image, its a silly one, or perhaps you resonate with it seriously? Either way, we need to adjust the contrast of the art work, please help by listing some of the options we can apply.
This is great fodder for creative inducement, consider the potential of how images speak to us, especially finding value in the subjective. What will you “allow” yourself to share?
Contrasts can be oh so subtle, they can disrupt the default patterns, this is a metaphor! How will you disrupt the pattern to bypass the part of you that clings to the familiar?
OK, patterns can also be very COOL! Patterns are about order, but order is in need of an integration of variety every so often, OK, this is another metaphor, see the pattern? 🙂
A little bit of movement goes a long long way! A little bit of texture goes a long way as well. Seems to me that creative variety is more accessible than we may think..
Ahem, you get the message, right?

“The Contemplation of Metaphoric Flight”, 2019, is a series of digital art illustrations & GIF animations generated from public domain source images via the NYPL digital archives. The illustrations were created by your old friend, Ryan Seslow. The new series of works above were specifically created to be displayed here on the C.A.C as a part of the Net Art website’s ongoing exhibition series. It is intended to serve as a visual example, an accessible template, and the creative potential for displaying, publishing, presenting and archiving such a project. (The whole thing is a metaphor)

Wait! Am I suggesting that an online exhibition, published as a blog post on a unique cross-campus social media network can also be used as a teaching tool? A transparent pedagogical tactic?! Well, yes, yes, I am! Lets dig in.

The original public domain images were cut-out with the pen-tool, composed and applied using adobe photoshop (photoshop is your friend and loves you). Do you need a photoshop pen-tool / cut-out video tutorial? Go Here – The cut-outs were necessary for the first iteration of the static pictures above. (Im referring to the bird portraits and the human clothes used to place their heads onto and into) The cut-outs are handy as they can be saved as both .psd files (the original photoshop documents) and as a transparent .PNG file. The .PNG files have a transparent background, this makes it easy to layer them over and into existing images. Plus they are forever re-usable (variation, variation, variation). But, Ryan, I don’t have access to Photoshop… OK, well, there is a trail versions! Sign up and try it! But after that trail ends, so that you know, photoshop is not required to do any of this. Web applications like Pixlr are free and accessible for all to use in the browser window itself, er, with access to the Internet of course.. OK, you can just download the .PNG files here in ready to use mode (your welcome). 

Click here to access my database, this includes all spiritual GIF making insights and alchemy tactics to engage students!

OK, so, there are a few animations above as well. The first animations above were created in adobe after effects. The renders were pushed to my iPhone and into mobile applications like Glitche (yikes, its only for iOS) and iPhone’s “Clips” video sequence maker (there are alternatives for android) The files can be saved as mp4 or .mov files making it easy to apply the videos into other mobile video editing apps. Filters are fun to play with for more customizing and visual effects. The videos can be looped into GIF animations using great apps like ImgPlay (this app is awesome, it re-sizes, edits, and has multiple out-put sources.) Animated GIFs are great extenders of so many forms of communication! Im hooked on making GIFS! I make them all public domain by adding them to Giphy.com so by all means use them at will! Here is my feed.

Of course, the digital art, illustration, collage, GIF animation aspect can be a great creative course project in and of itself! Indeed, both on an individual level but perhaps collaborating is where the extended creativity and learning takes place. This can be achieved through digital storytelling using a blogging platform just like this one. See that, you find yourself “inside the actual example”! The illustrations above clearly required a caption, captions and or a narrative. Is the narrative fictional? Will you write a short story to support the images or maybe a reflection induced by the sequences of images? What references come to mind or coincide? How can you make the description compelling? Will you share hyperlinks to your references and resources? Will you embed animated GIFs or other snippets of relevant content? Can you recompose this blog post and use it as a metaphoric template for your own class project, assignment, syllabus or exhibition? (Hint, you can easily break free of the digital art example, but it might be fun to play with this as an idea.)

I believe that this example / template series will expand, who wants to collaborate on a creative cross campus project?

And seriously, have FUN with this!


The Graphic Design for Websites Workshop

(The logo above was made with CC licensed icons used from thenounproject.com by Smalllike & CreativeArt & generated using pixlr.com)

Graphic Design for Websites (and beyond)

“Graphic Design for Websites” is a workshop placing an emphasis on the basic elements and principles of graphic design in relationship to front end web design aesthetics. Students will be exposed to various examples and applications for wordpress based websites (on the CUNY academic commons and beyond). The workshop will also introduce and apply a myriad of Open Education Resources on design, techniques and software. Hands on exercises will be explored. Bring your laptop.

Welcome to the Graphic Design for Websites workshop!

Here we are, March 19th 2019 at the CUNY Graduate Center, NYC for the Digital Initiatives program!

Reminder #1Nothing is static.

Reminder #2 – Everything is default until we intervene, investigate, interact and define who we are in relationship to that thing. 

Introductions – This presentation and workshop is a blog post! A URL! It was specifically organized, designed and published this way, which all takes place on website.

URL, please meet the in real-life workshop students and guests. In real-life workshop students and guests please meet the URL. This blog post will grow and expand, I greatly look forward to your additions, suggestions and comments!

Meet Ryan Seslow @ryanseslow (say hello) – Artist, Graphic Designer & professor of Art & Design – Allow me to share a few stories – https://ryanseslow.com

What is Graphic Design?

A great definition by: Juliette Cezzar

Graphic design, also known as communication design, is the art and practice of planning and projecting ideas and experiences with visual and textual content. The form it takes can be physical or virtual and can include images, words, or graphics. The experience can take place in an instant or over a long period of time. The work can happen at any scale, from the design of a single postage stamp to a national postal signage system. It can be intended for a small number of people, such as a one-off or limited-edition book or exhibition design, or can be seen by millions, as with the interlinked digital and physical content of an international news organization. It can also be for any purpose, whether commercial, educational, cultural, or political.”  https://www.aiga.org/guide-whatisgraphicdesign

QuestionAfter reading this definition, what is the first image that comes to your mind / attention?


According to Just Creative – here are some of today’s Trends in Graphic Design, 2019 Edition.

What is Visual Literacy? The ability to recognize and understand ideas conveyed through visible actions or images, such as pictures. (according to)

Visual literacy is a skill. A visual literacy is the ability to both understand and produce visual messages. In today’s world of ever-expanding mass media it is becoming increasingly more important to understand. As almost all information and entertainment is acquired through non-print media, the ability to think critically and visually about the images and content  presented becomes crucial.

Where is Graphic Design visually present?

Everywhere! Literally. All kinds of signs and symbols both digital and non, transportation, corporate identity and branding, all forms of packaging, printed materials, Internet / online content, websites, Ads, banners, blogs, e-books, album covers, news media, film and television titles, graphics of all kinds, fashion, clothing designs, art and so much more!

But wait, Are you a Designer? You’re all designing things each day, all day long, lets take a look into what this means..


How does design effect communication?

We must ask the question, what is the language of Design? One must identify and understand the Elements and Principles. The elements and principles are the design vocabulary – (Standard – the way it is defined in academic terms – versus – Customized – the way it is defined via each individual person) 

*An exercise for later Generate a series of images taken with your smart phone that visually define the elements and principles of design in public space. We are in NYC, so…design is everywhere, reaching us both consciously and unconsciously. However, we never see a “single design” or “a single building” we see it with in relationship to everything else that is around it. Gather your images and publish them into a blog post. Send your published URL to me no later than tomorrow at 8am. (Im kidding, at leisure)


Where is the attention of human beings these days?

Obviously, online. The Internet!

How does design play a role in the way that we use the Internet and websites for teaching, learning, creating new courses, sharing course work, assignments and generating discussions? What about the way we conduct research, shop, entertain ourselves and so on? Are you consuming more than creating? Is it possible to creatively consume?


What is Creativity?

Creativity is the action and ability to give tangible form to an idea, impulse or intuition. It can be a new idea, or it can be an extension of something that already exists. Creativity can change the context of something in a new and innovating way.

Creativity and being human are synonymous (even thought your ego can trick you into not believing this) Creativity’s desire is your human desire and need of physical expression.

What role does storytelling play in the application of design and websites?

It comes down to Intention. Conscious intention. How can we apply this? Where do we start?

Let’s chat about Contrast. Contrast is wonderful. But contrast can also be a great motivator of procrastination. Endlessly seeking more and more examples can equal less and less actual action. Anyone guilty of this?

What would you like to create? What would you like to make? How will you go about it? Are you willing to practice?


Storytelling & Design & the power of the URL!

Wally Sutton’s Method 

Process, Practice & Permission to be Experimental:

Here is your permission intervention. I hereby give you the permission to jump in! Its not at all uncommon to have MULTIPLE projects happening at once on the web. We all know this from the classes that we are taking and the classes that we may be teaching. (Im teaching 8 courses between 4 colleges and taking 2 courses for myself) From the projects we are a part of both individually and collaboratively, the more that we do, the more we realize that we can do. Sometimes “more” is simply being experimental! Its OK to use experimentation as the SUBJECT. Narrate and illustrate the process and observe how it organically takes form.


Platforms:

  • CUNY Academic Commons – Free for all CUNY teaching faculty and students – wordpress platform that functions as a social network with in the larger CUNY community as a whole. How can you not be a part of this?
  • WordPress & Reclaim Hosting – I highly recommend this synthesis of awesomeness.
  • Tumblr – Free and very customizable, lots of options.
  • WIX – Free and paid versions, also very customizable with a lot of options.


Projects as Websites, Websites as Projects, either way, its COMMUNICATION. Make it open, make it transparent. 


Teaching NET-ART – Teach the Course(s) you have always wanted to teach! Create, design and build it! Your rules, your examples, your unique way of sharing. Im using the CUNY Academic Commons for this course.

Cross Campus Collaboration – My CUNY BMCC foundation Graphic Design course collaborated with my York college Digital Storytelling class to produce both an online and public example of collaboration. Our cross course ZINE was created in partnership and donated to the NYPL’s public ZINE collection and archive.

Online ExhibitionsExample #1Example #2

Public Projects / Group Exhibitions / Galleries & Open Calls:

Net-Art :: Open Call

https://giftheportrait.tumblr.com/

http://animatingtransit.com/

Presentations – Lightning Talk!
 

(Above – a graphic icon / logo remix created with the Assembly app for iOS mobile)


Software:

The Industry standard software / tools for graphic design is Adobe.

Adobe Photoshop & Adobe Illustrator are powerful tools that can be used to generate virtually anything visual. From all types of static images and graphics, to logos, icons and animations, to retouching and layout. Adobe offers monthly subscriptions for their software and if it is affordable on the end of the user, it should be applied and taken advantage of.


Alternatives to Adobe Software:

GIMP – https://www.gimp.org/ – iOs & Windows


Web Browser applications:

PIXLR – https://pixlr.com

vectr – https://vectr.com


Mobile Applications:

Assembly (iOS only) http://assemblyapp.co/


Additional Digital Art & Design Tools – This is a growing list and archive that has been building right here on this website. I encourage you to jump in, pick a new application or platform every few weeks and experiment!
 

Lets get to the DESIGN Making PART!


Lets assume that you do not have access to adobe photoshop, but you do have access to the internet, a web browser, and creativity that is pouring out of you!

  1. Lets open pixlr and Design a logo,  icon or symbol that communicates and or supports something that you are currently working on. A logo for your course or personal website? A hybrid graphic icon to express several things that you are interested in? I created the logo / graphic for this presentation at the top of the post using pixlr and icons from the noun project. I added the text in pixlr as well. I applied attribution to the creators via the Creative Commons policy. 
  2. Lets use pixlr again to generate a poster design that uses transparent graphic assets and text. I created a public folder here where you can access, download and the apply the graphics. Lets practice composing a picture using multiple elements. (Of course you can also discover and apply your own graphics!) 

Save your work as a .jpg file and e-mail it to me! Rseslow@york.cuny.edu or Ryan (at) ryanseslow.com –  I will build a gallery of workshop contributions below this sentence!


(((((COMING SOON in this SPACE – The WORKSHOP OUTCOMES!)))))


Open Education Resources – Courses to follow along with by Professor Seslow:

https://netart.commons.gc.cuny.edu

https://bmccmma100.commons.gc.cuny.edu

https://openlab.bmcc.cuny.edu/mma100-seslow-spring-2019

http://ct101.us


OER Resources – Text Books (online):

Digital Foundations: http://write.flossmanuals.net/digital-foundations/introduction

Graphic Design and Print Production Fundamentals: https://open.umn.edu/opentextbooks/textbooks/344


Free Udemy Course:

Intro to Graphic Design – https://www.udemy.com/share/1001yQAkITd1dbTHQ=/


Online Guides, Tutorials & Project Resources:

Adobe – https://www.adobe.com

Adobe Photoshop Tutorials – https://helpx.adobe.com/photoshop/tutorials.html

Adobe Illustrator Tutorials – https://helpx.adobe.com/illustrator/tutorials.html

Terry White’s Youtube Channel for Adobe Tutorials & Beyond – https://www.youtube.com/user/terrywhitetechblog/videos

Wpbeginner.com – WordPress tips, tricks and more – https://www.wpbeginner.com/guides/

DS106 Assignment Bank – http://assignments.ds106.us/

Daily Create – http://daily.ds106.us/


Image Repositories and Graphic Resources:

The Noun Project –  “Graphic Icons for anything”

Open-Access – Digital Collection – The Metropolitan Museum of Art

Public Domain Images  Public domain images, royalty free stock photos, copyright friendly free images. Not copyrighted, no rights reserved.

U.S. Government Graphics and Photos

Library of Congress Prints & Photographs Online Images from the Library of Congress, now in the public domain.

National Gallery of Art  With the launch of NGA Images, the National Gallery of Art implements an open access policy for digital images of works of art that the Gallery believes to be in the public domain.

Digital Public Library of America The Digital Public Library of America

NYPL – The New York Public Library Digital Collections Archive

Flickr CC – Creative Commons on Flickr.

Gif Cities – Internet Archive


Useful Articles & Inspiration:

What is Graphic Design? https://www.aiga.org/guide-whatisgraphicdesign

Design History.org – http://www.designhistory.org

Key Moments in Graphic Design / Timeline – https://www.thoughtco.com/key-moments-in-graphic-design-history-1697527

Gestalt – Introduction – https://www.canva.com/learn/gestalt-theory/

Useful Article on Color Theory 1:

https://medium.com/gravitdesigner/an-easy-approach-to-color-theory-and-graphic-design-8b9287c95e42

Useful Article on Color Theory 2:

https://www.blackbeardesign.com/understanding-color-the-meaning-of-color/

Useful Article on Color Theory 3:

https://www.creativebloq.com/colour/colour-theory-11121290

Color & Logos / Brand Identity:

http://justcreative.com/2018/02/19/color-psychology-in-logo-design-branding-explained/

New York City Transit Graphics Standards Manual – 1970

https://daringfawnyball.files.wordpress.com/2013/02/nyctamanual.pdf

Adobe’s blog on Creativity

AIGA – Professional Association for Design


Graphic Designers:

Michael Beirut  – @michaelbierut 

Pentagram Design

Debbie Millman 

Joshua Davis

Paula Scher

Jacob Cass / JustCreative

Saul Bass

Susan Kare

Paul Rand

Gail Anderson

Milton Glaser

Alan Fletcher

Herb Lubalin

Lucille Tenazas

Aaron Draplin 

Dribbble – Graphic Design Community / Social Network

50 Amazing Graphic Designers You Should Know


Books:

1. Graphic Design: The New Basics Paperback, Ellen Lupton, Jennifer Cole Phillips, Princeton Architectural Press, 1st Edition – ISBN# 1568987021;9781568987026

2. How to: Michael Bierut, Harper Collins Publishers, ISBN# 978-0-06-241390-1

3. Illustrator, Photoshop and InDesign Visual Quickstart Guides (Peachpit Press)


Many thanks to Dr. Lisa Rhody for the opportunity to present and share this workshop!

Online Exhibition :: Communicating My Deaf & Hard of Hearing Self – Part 1

Communicating My Deaf & Hard of Hearing Self – Part 1

Welcome to my first series of art works produced examining and identifying as a deaf and hard of hearing person. It has been a long road. This body of work is the first in a multi-part series with supporting written explanations broken down into individual blog posts. I encourage the viewer to view the gallery of digital art works above and then delve into the individual blog posts listed below.

All of the pieces have been created in 2018 and consist of Digital Illustrations, Collage, Animated GIFs & Video Art. Fragments of manipulated grainy images and re-compositions display the variation and extension of each piece. The works are visual representations for the regular distortions, missing of sounds, words and overall communication I experience daily. They represent how I feel, react, overcompensate and adjust to communication in various interactions. They are intended to be both subtle, confusing and difficult to follow. “Communicating My Deafness – Part 1” is the first installation in the series. It is first published here on my website and shared via my social media platforms. I am seeking to extend this body of work into a lecture series for both the deaf, hard of hearing and the hearing world.

Animated Hearing – https://www.ryanseslow.com/animated-hearing/

Missed Communication Continued – https://www.ryanseslow.com/missed-communication-continued/

40 Years of Missed Communication – https://www.ryanseslow.com/unraveling-integrating-40-years-of-missed-communication/

Fears Faced Continued – https://www.ryanseslow.com/fears-faced-continued-is-this-is-a-series/

The More I missed, the More I Made – https://www.ryanseslow.com/the-more-i-missed-the-more-i-made/

1970’s Hearing Test Art Machine Hacker – https://www.ryanseslow.com/the-1970s-hearing-test-art-machine-hacker/

Opening Another Door – https://www.ryanseslow.com/opening-another-door/

Responsible Communication RE-sponsibility – https://www.ryanseslow.com/responsible-communication-re-sponsibility/

Non-Auditory Sensory Other – https://www.ryanseslow.com/the-non-auditory-sensory-other/

View the entire category on my website here

Web Tools & Visual Presentation Options for Students!


Its that time of the semester again. Student Presentations!

The final week is upon us and it is time to present your semester’s worth of completed work. As New Media Art student’s there are so many opportunities at hand! The word “presentation” is a great word in and of itself. It is motivating, inspirational and energetic. Students will aspire to present their class projects in a new way that is impactful and complimentary to the work itself. You want to capture the full attention of your classmates, peers and colleagues and engage them with your visual display!

How will you do this?

Of course we have all seen powerpoint presentation after powerpoint presentation, over and over again. I suppose that you can always default to this platform……bo-ring. In 2018, I have witnessed, if the entire class is expected to present something using powerpoint, the class of viewers usually checks out by presentation number 3… defaulting to their own interests via their mobile devices, and asserting about 40-60% of their attention to the ongoing powerpoint presentations…

Again, how will re-consider this process?

Time and Attention are synonymous. Engagement and the ability to share usable value through out the presentation is a must. You can do this by creating a presentation format that no one else has seen before… 

Suggested platforms for presenting New Media Art works, Social Media!

Chances are, you are already deeply engaged in several social media platforms. Sharing fragments of your life, interests and also re-sharing what inspires you or gets you fired up! You most likely already have a working knowledge of how to use the applications and their tools. Some of you may already integrate your art work and creative projects into your feed of “life stuff”. Some of you may keep it separate. I personally use an 80/20 ratio of sharing my content. I’m transparent about my professional work as a graphic designer, a college art & design professor and an artist. This is a part of my personal brand. I like transparency and encourage you to also explore this.

However, if that does not seem like a good fit for you, you can easily create a new account on any one of these platforms below. You can easily upload your work and add commentary to each piece that gives a description of the project, the concept behind it, the medium used and any other relatedness that you wish. Using one or a hack using two or three as an integration, these platforms below make your work both individually accessible via a URL as well making you and your presentation easy to find on the Internet.

If you put the experimental work into this process it can easily become a wireframe for your new presentation and or online portfolio. Be a leader!

Suggested Social Media platforms:

Create an account specifically for your presentation.

Create an interesting title for your presentation!

Instagram Use the traditional feed to compose your static images and videos. Mov. and mp4 files will loop (like GIFs do) if they are 3 seconds or longer, a perfect solution for animated work. You may also use their stories option to generate “highlights” or curated works and archive projects specifically – (keep in mind that the stories feature uses a different aspect ratio that is vertical rather than the square format for the traditional feed.) Lots of options here! Instagram is a Mobile app, so all of the content needs to be generated through the app on your smart phone. Instagram makes it easy to link your other social media accounts and cross post content if you wish. The app can be downloaded from google play for android or the app store for apple iOS devices.

TumblrThough many say tumblr is dead, I disagree! Context is everything! Creating and using tumblr can be very effective for creating a great portfolio of specific works as well as a means of presentation! There are tons of free themes and it is an open source web platform. You can choose to use the mobile version by downloading the app or by signing up via the desktop platform. (I currently use the desktop platform over the mobile app) Tumblr makes it easy to add audio, video, images, gifs, urls, quotes and a chat feature. There are size restrictions and your content and they will have to be optimized to meet the rules.

TwitterTwitter is a powerful real-time and archived research and sharing tool (and so much more.) Twitter is now 280 characters per tweet. This forces tweets to be thoughtful, concise and objective! Its great for today’s small bite attentions spans! (We are all guilty!) Twitter is an under used platform for visual presentations but can easily be leveraged into one! Twitter will support images of all kinds, gifs, urls and more. There are size restrictions and your content will have to be optimized to meet the rules. A twitter presentation can be presented, archived and hosted via twitter in actual time via the app or desktop platform. Real-time commentary, discussion and sharing is a great added feature. I encourage you to test its potential!

LinkedInMostly used as business and business networking platform, LinkedIn recently added several new features that have made it more attractive to those who were once on the fence about signing up. Using LinkedIn may be more strategic than you think as you will have the ability to post your content in chronological order (much like any other feed of a content management systems would) as well as publish articles that function much like individual blog posts.


Suggested Free Website Building platforms:

WordPress and Wix both offer free versions of their website building platforms. They are easy to work with and offer some really great features! Creating website for your work is necessary, and if the time is allotted, why not make your presentation a website in and of itself!

WordPressWordPress.com

WixWix.com

Of course you can always do a traditional web search for “presentation tools” online and see what you discover.

In fact, please share your feedback and ideas, links, apps and otherness below in the comments section!